Although check-ins can be a great way to share your location with others – or document your travel history, they can also be seen as an invasion of privacy.
Thankfully, if you decide that you no longer want to have them tied to your account, removing them permanently is easy.
In this article, I’ll go over step-by-step how you can remove check-ins from your Facebook posts, both on desktop, as well as on the mobile app. This can be done either for specific check-ins, or for all of your check-ins entirely.
Without any further ado, let’s get started!
How To Delete Check-Ins On Facebook (Desktop)
First, let’s look over how you can delete check-ins on the Facebook website, using your computer.
The entire process only takes a few steps, and is very quick once you know what to do!
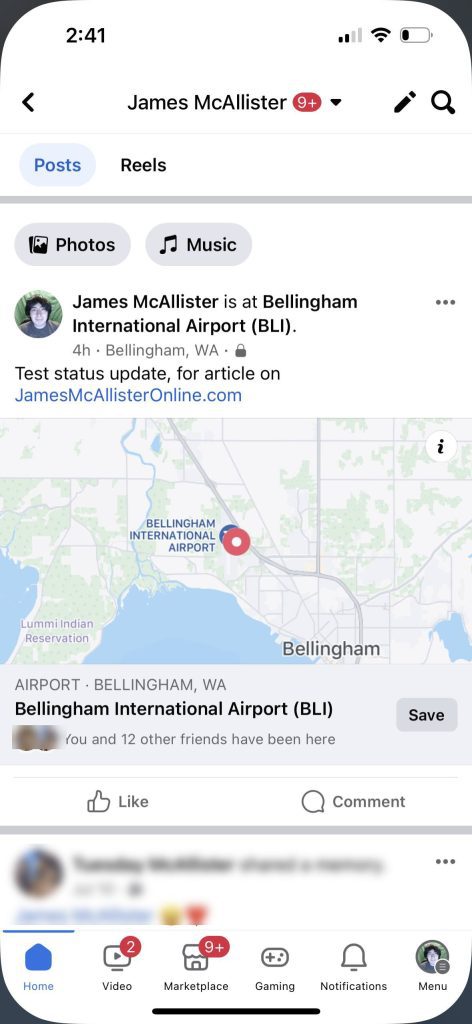
1. Locate The Post With The Check-In
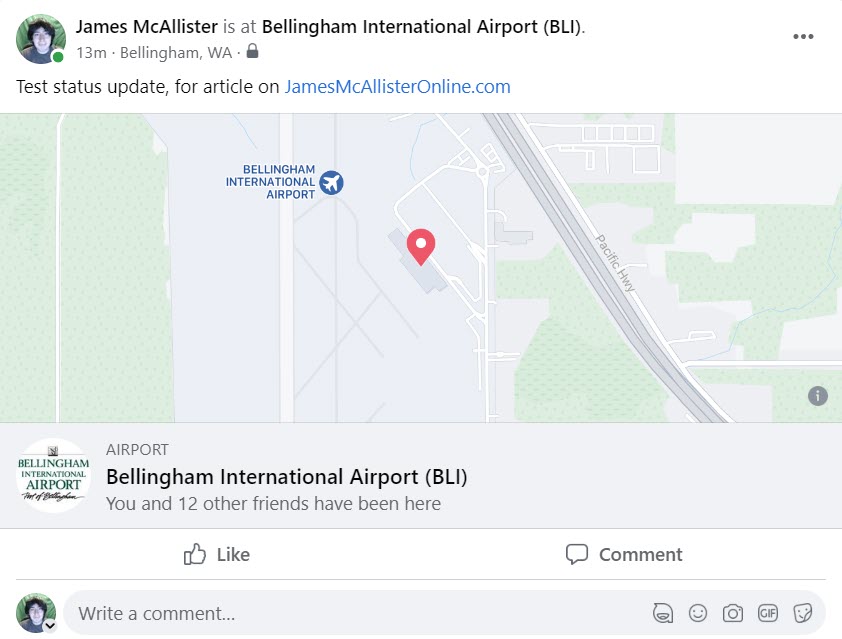
First, locate the post that has the check-in that you wish to delete.
This can be done either by visiting your profile and scrolling, or by doing a search on your timeline for the specific location. To learn how to search your Facebook timeline, click here!
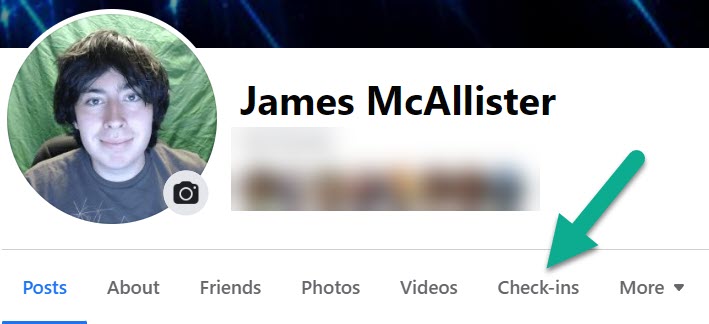
Note that while Facebook does have a button on your profile that can show you all of your check-ins at once, it won’t take you to the actual posts.
However, it will still show you all the locations you’ve checked in at, so you’ll know what to search for.
Anyhow, once you’ve located the check-in you want to delete, continue onto the next step!
2. Click On The Icon With Three Dots
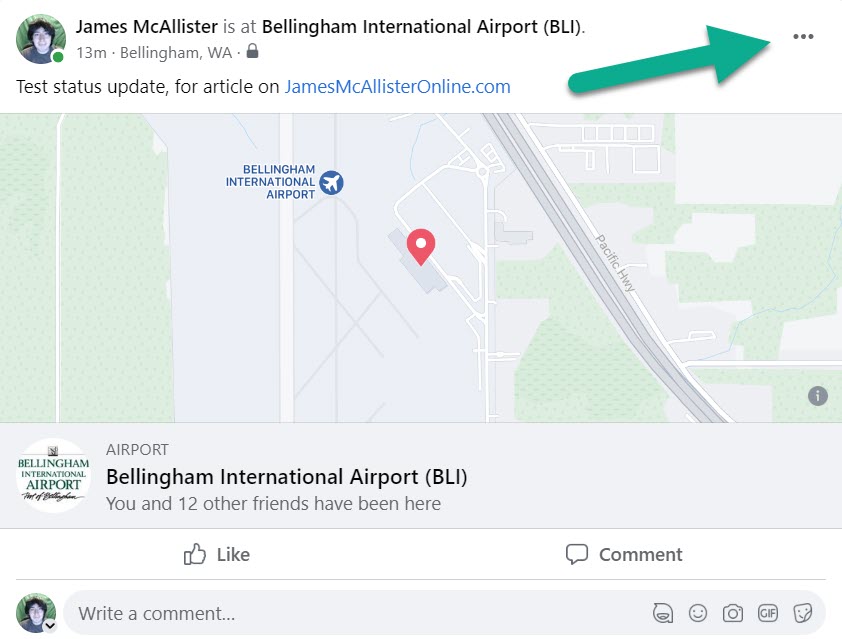
Next, click on the icon with three horizontal dots, which should be located in the top-right corner of the post.
Doing so will open a new menu with additional options.
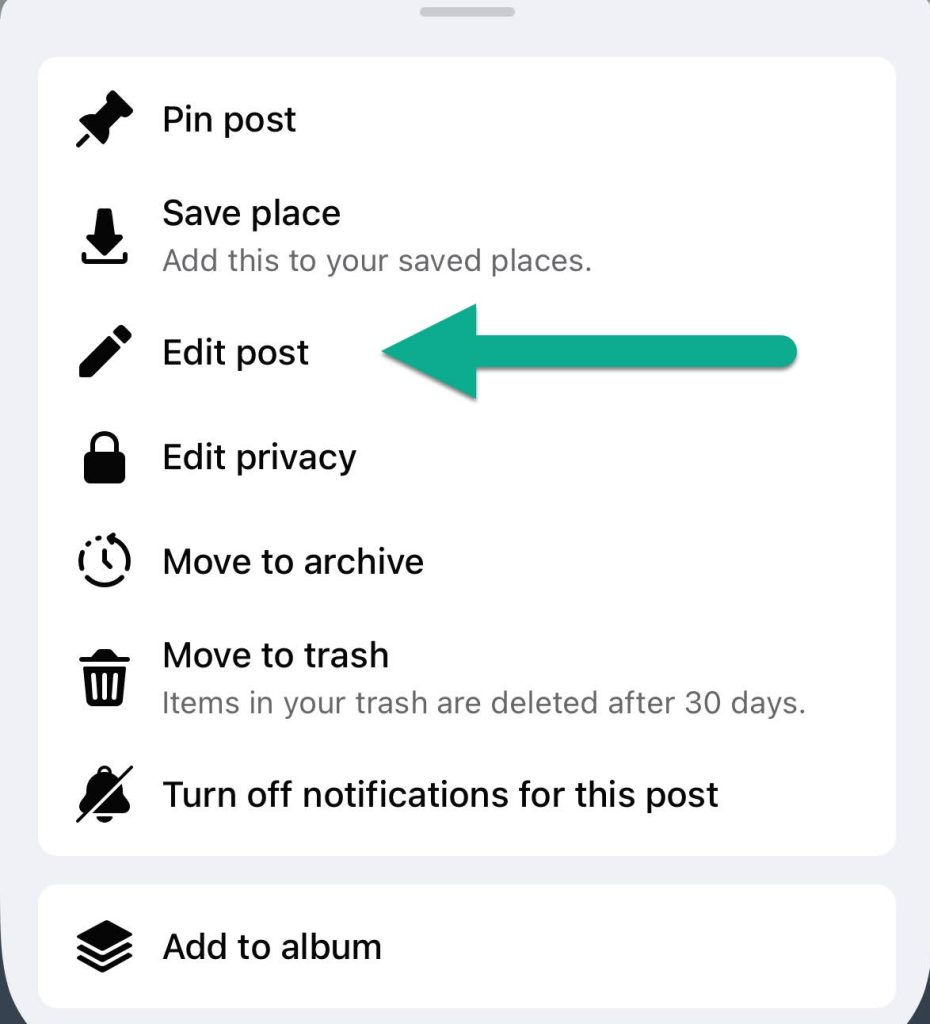
3. Click ‘Edit Post’
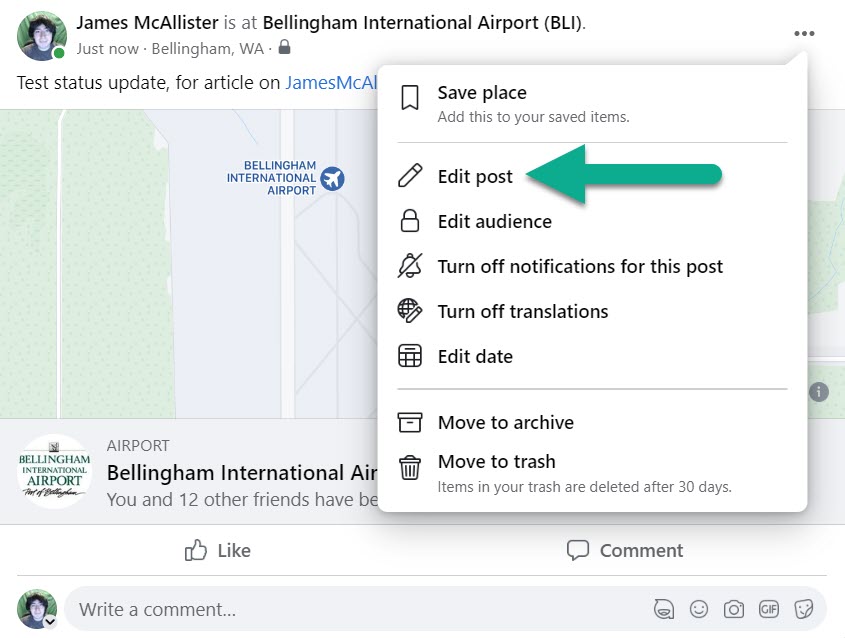
The new menu will present you with several options, including the ability to save the place, edit the audience, turn off notifications, and more.
However, the option you’ll want to choose here is ‘Edit post.’
Click on it, and a new window should appear.
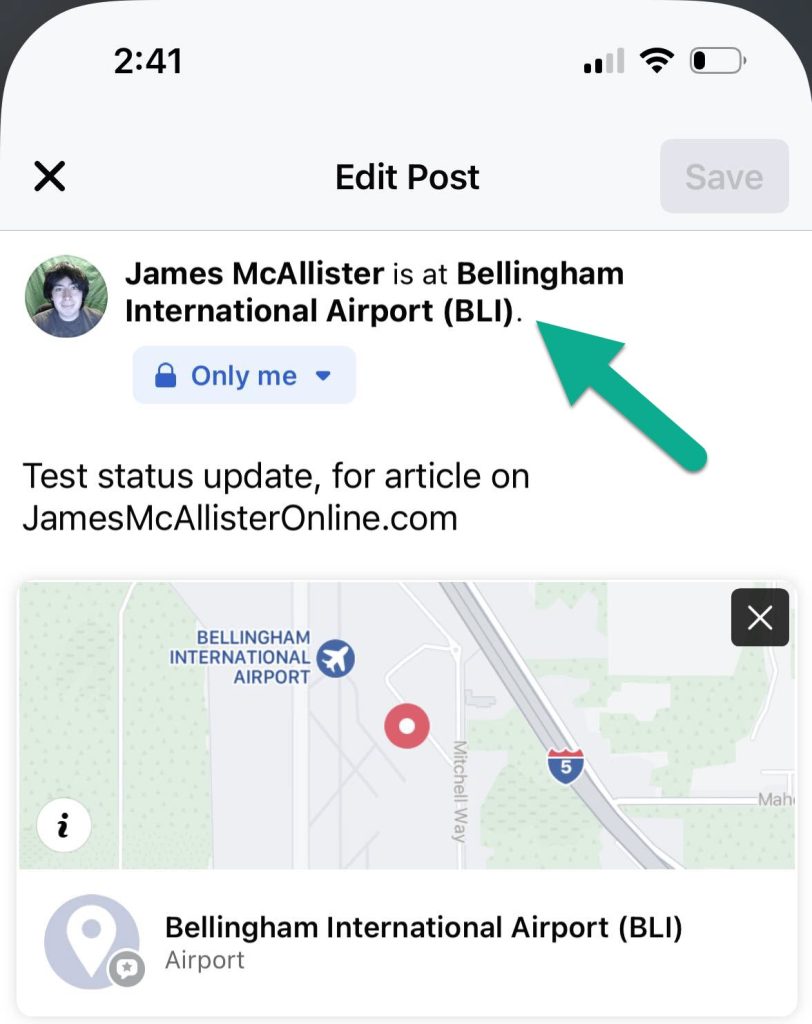
4. Click On The Check-In Button
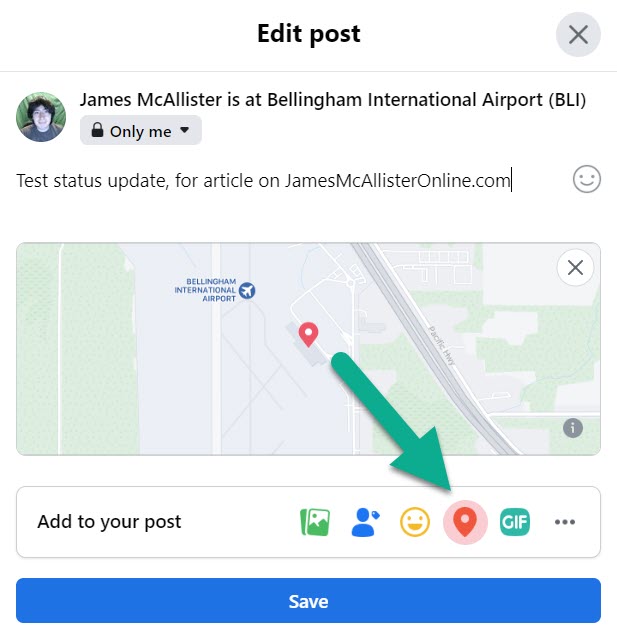
On the new window, you’ll have the ability to edit the post’s content, including what you wrote originally.
However, you’ll want to pay attention to the ‘Add to your post’ section.
Inside of it, there will be several little icons – including the ability to add photos, tag friends, or insert GIFs. To edit the check-in however, click on the location marker to open up your check-in for this post.
5. Click On Any Of The Suggested Check-Ins
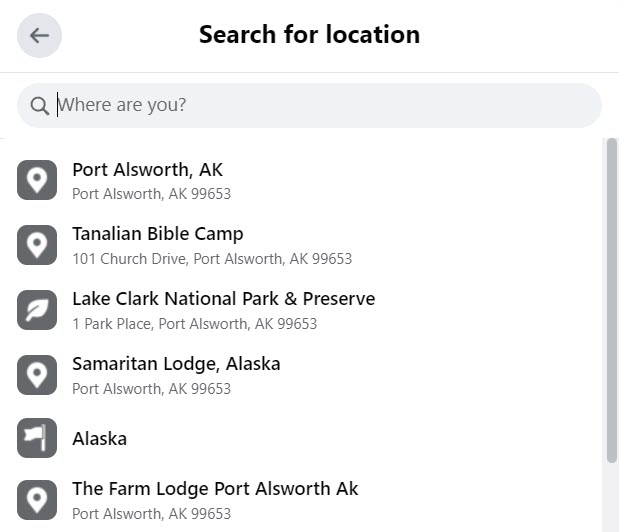
Here’s where things get a little weird – instead of showing you the place you’ve actually checked-in, Facebook will display a list of suggested locations, while also allowing you to search for a specific one.
While you can update it to whatever you like, if you want to delete the check-in entirely, it’s quickest to just click on any one of the suggested locations. We aren’t going to save it, but it’s needed for the next step.
So, click on any of the options that pop-up – preferably one towards the top. Then, proceed to the next step.
6. Click The Location Icon Again, And Then Deselect The Location You Just Chose
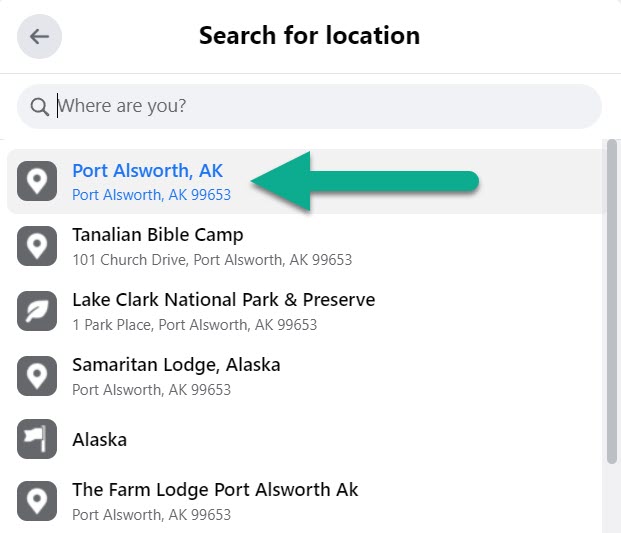
Once you select a location in the last step, you’ll be taken back to the ‘Edit Post’ screen.
From there, click on the location a second time.
You should now notice that the location you just chose is highlighted in blue. Click on in again in order to deseslect it, which will remove the check-in from your post.
7. Save The Changes
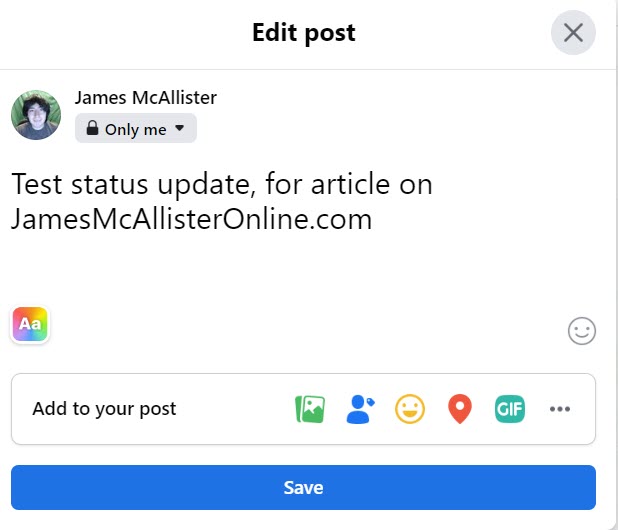
Once you deselect the location in the last step, you’ll be returned to the ‘Edit post’ screen as pictured above.
However, you’ll notice that the check-in is gone! Not only will it no longer say you were at a specific location, but the map below the text will disappear as well.
From here, all you’ve got to do is click on the blue ‘Save’ button, and the check-in will be removed for good!
How To Delete Check-Ins On The Facebook Mobile App
Now, let’s look over how you can remove check-ins on the Facebook mobile app.
Thankfully, it’s even simpler to remove them on mobile than it is on your computer! So, if you have a lot of check-ins you want to delete, it may be better to do it on your phone instead.
Note that this process is exactly the same on both iPhone and Android.
1. Locate The Post With The Check-In
First things first, locate the post that has the check-in that you want to remove.
The easiest way to do this is to scroll through your profile until you find it. However, if you know the location or what you wrote in the post, you can also search your timeline by tapping on the search icon in the top-right corner!
2. Tap On The Icon With Three Dots
![]()
Once you’ve located the post, tap on the icon with three horizontal dots in the top-right corner of the post.
This will pull up a menu with additional options.
3. Tap ‘Edit Post’
On the new menu that pops up, you’ll be presented with several options – such as archiving the post, pinning it, or even changing who sees it.
However, in this circumstance, you want to edit the post itself.
So, click on the ‘Edit post’ button (with the icon of a pencil) to pull up more options.
4. Tap On The Location Of The Check-In
Once you’re on the edit post screen, you are granted additional options.
If you only want to remove the map, simply tap on the X and it will disappear from the post. Then, you can save the change and be done.
If you want to remove the check-in entirely however, tap on the bolded location text after “(Your Name) is at…”
This will pull up yet another page, but don’t worry! At this point, we’re almost done.
5. Tap The ‘X’ Next To The Location, Then Tap ‘Done’
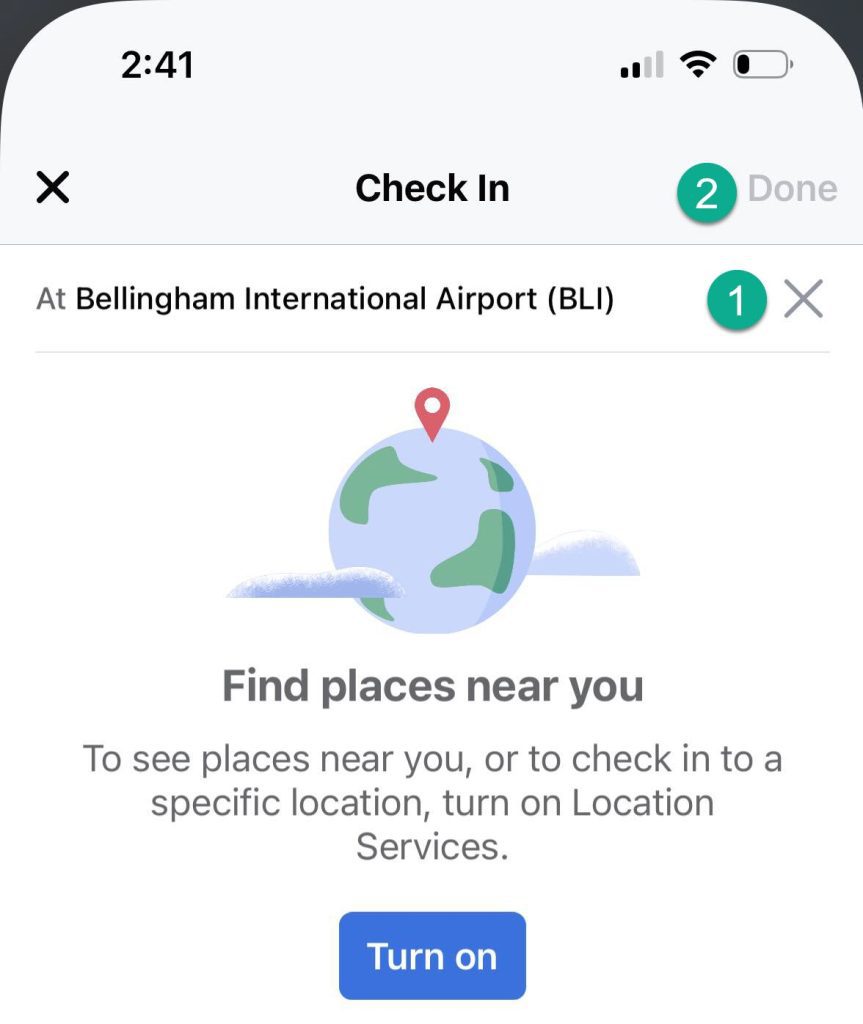
From here, you’ll be able to edit the location of the check-in.
While you can change it if you want, the only way to remove it entirely is to first tap on the X icon next to the location, in order to delete it.
Once you’ve done so, tap on the ‘Done’ icon in the top-right corner. After you’ve made a change, it should turn blue and become tappable.
6. Tap The ‘Save’ Button
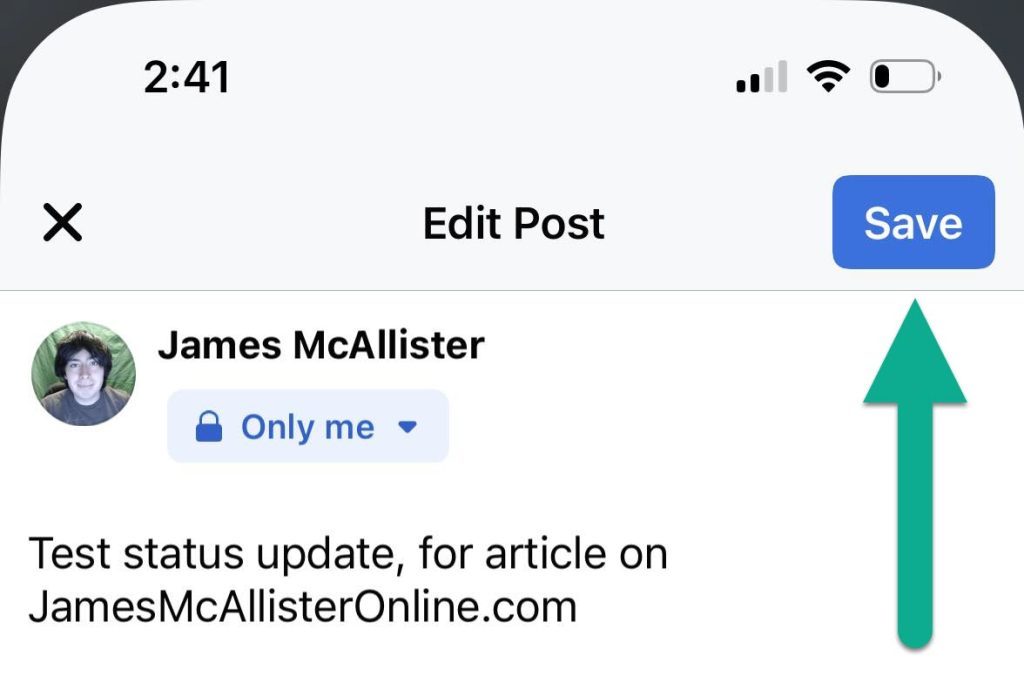
Finally, you’ll be brought back to the Edit Post page.
Only now, the check-in will be gone!
Once you’ve verified it’s no longer there, click the blue ‘Save’ button to save your changes.
Congratulations – the check-in is now permanently deleted!
What Are Check-Ins Good For, Anyway?
Although it may seem like check-ins are an invasion of privacy, there are some situations where they can be really helpful.
For example, Facebook will let you know which of your other friends have checked in at the same location, giving you the opportunity to connect with them and talk about it. It’s something the two of you have in common, so if you’ve both visited the same vacation spot or ate at the same restaurant for example, you can share your experiences with each other.
Some people use check-ins as a sort of digital journal, so they can look back at all of the places that they’ve been – and when they’ve last been there.
Finally, checking in somewhere allows other people who are in the area to potentially meet up with you. In a world with less face-to-face communication than ever, seeing your friends in person can be a welcome surprise.
So, feel free to remove specific check-ins that you no longer want posted – but don’t hesitate to continue utilizing the feature in the future!
P.S: Facebook also likes when you check-in at different places, because it gives them additional data they can use to target you with ads. Take that for what you will!
Conclusion
Once you know what to do, deleting your Facebook check-ins is an easy process.
While you unfortunately have to do this one-by-one, it’s quite quick to remove a check-in from a post. For the fastest results, I recommend using the mobile app, as there are less steps involved than on desktop.
I hope that you’ve found this article helpful, and you’ve managed to remove the check-ins you no longer wanted posted.
If you have any other questions about Facebook, ask them below and I’ll be happy to help.
Wishing you the best,
– James McAllister
