Out of all the editing you’ll be doing in Audacity, perhaps the most common thing you’ll be doing is trimming and cutting audio.
This is especially true if you’re using Audacity for a podcast, or other forms of content creation. The fact of the matter is, nobody records perfectly every time, and cutting out undesirable bits is critical for high quality recordings.
Best of all, if you do it right, nobody will ever be able to tell that it wasn’t recorded perfectly the first time! Despite recording years of scripts, there may still be 10 or more cuts in each podcast episode I release, and listeners wouldn’t ever have an idea.
Here Are Some Common Things You’ll Want To Edit Out
Let’s quickly cover a few things you’ll want to be sure to edit out while editing your recorded audio in Audacity.
‘Ums’ and ‘Uhs’
We all have a habit of doing this while recording, particularly if we’re new and nervous. We have a natural inclination to fill silence with sound, and ‘ums’ and ‘uhs’ are a result.
Repeated Phrases
If you’re reading off of a script and you realize that you make a mistake, it’s usually a good idea to repeat the phrase over again correctly. Just don’t forget to edit out the first take!
Background Noise
Door knocking in the background? Phone ring? Edit these things out when you can.
Mouth Clicks
People don’t want to hear your saliva moving around inside of your mouth. Especially if they’re wearing headphones.
Unnaturally Long Pauses
Sometimes, we may wait to long to continue speaking. Pauses should be cut down to a natural length for a more pleasant listening experience. Just be sure to listen to the audio where you cut it – it is easy to cut the middle of a breath out (so the breath starts, and then suddenly disappears) and this sounds more unnatural than leaving the full thing in.
Long Intros And Outros
There tends to be extra unnecessary silence at the beginning and ending of recordings. This should be trimmed down.
How To Cut Audio In Audacity

The quickest and easiest way to cut down audio in Audacity, is to highlight the audio you wish to remove using the selection tool.
Once it’s highlighted, hit the ‘Delete’ key on your keyboard. Alternatively, you can use the keyboard command Ctrl+K (on Windows) or Command+K (on Mac), or go up to the edit menu and click ‘Delete’.
Both of these options take more time than just pressing the delete key, so I’m not sure why you’d want to do that, though.
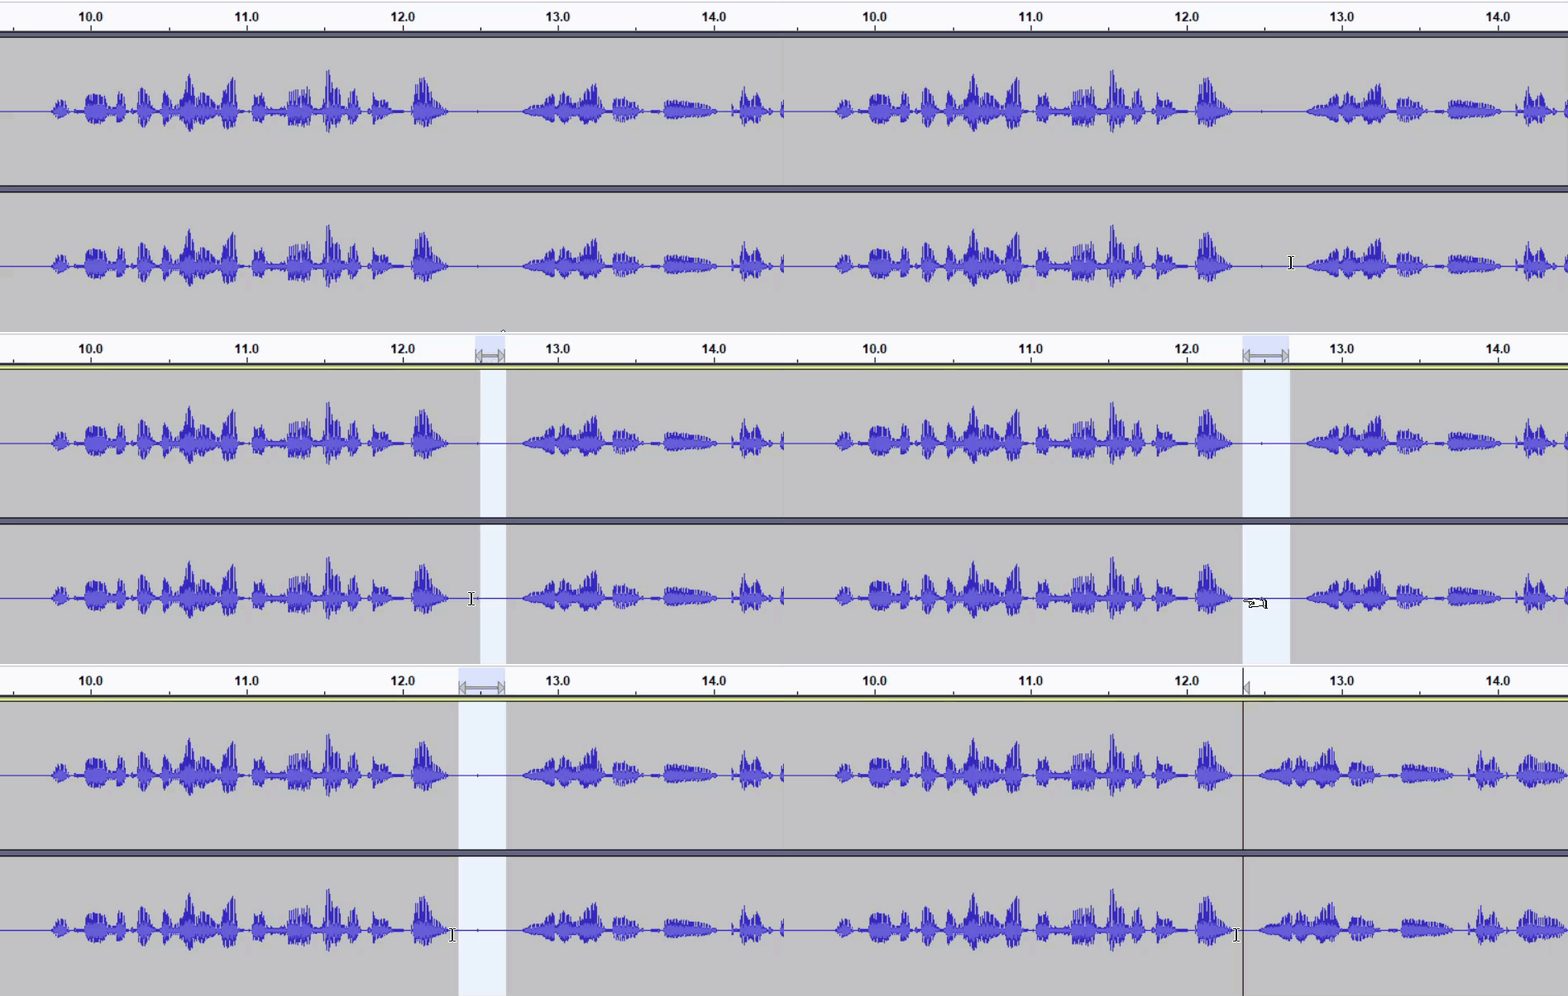
You can see an example of audio being deleted in the GIF above. Notice how Audacity automatically shifts everything over, so there isn’t anything that you have left to do.
If you don’t want the audio to shift over, consider silencing it instead. This will remove any noise present, but will not move anything around, keeping everything the same duration.
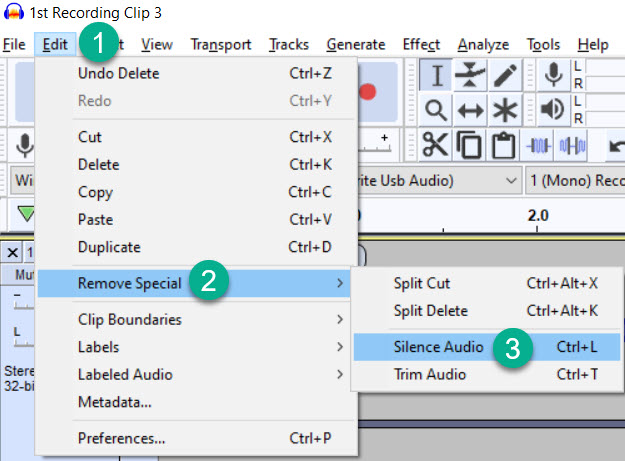
To silence audio in Audacity, use the shortcut Ctrl + L or go to Edit –> Remove Special –> Silence Audio

How To Trim Audio In Audacity
If you take a look at the picture above, you may notice another setting called ‘Trim Audio’.
This is different than deleting it.
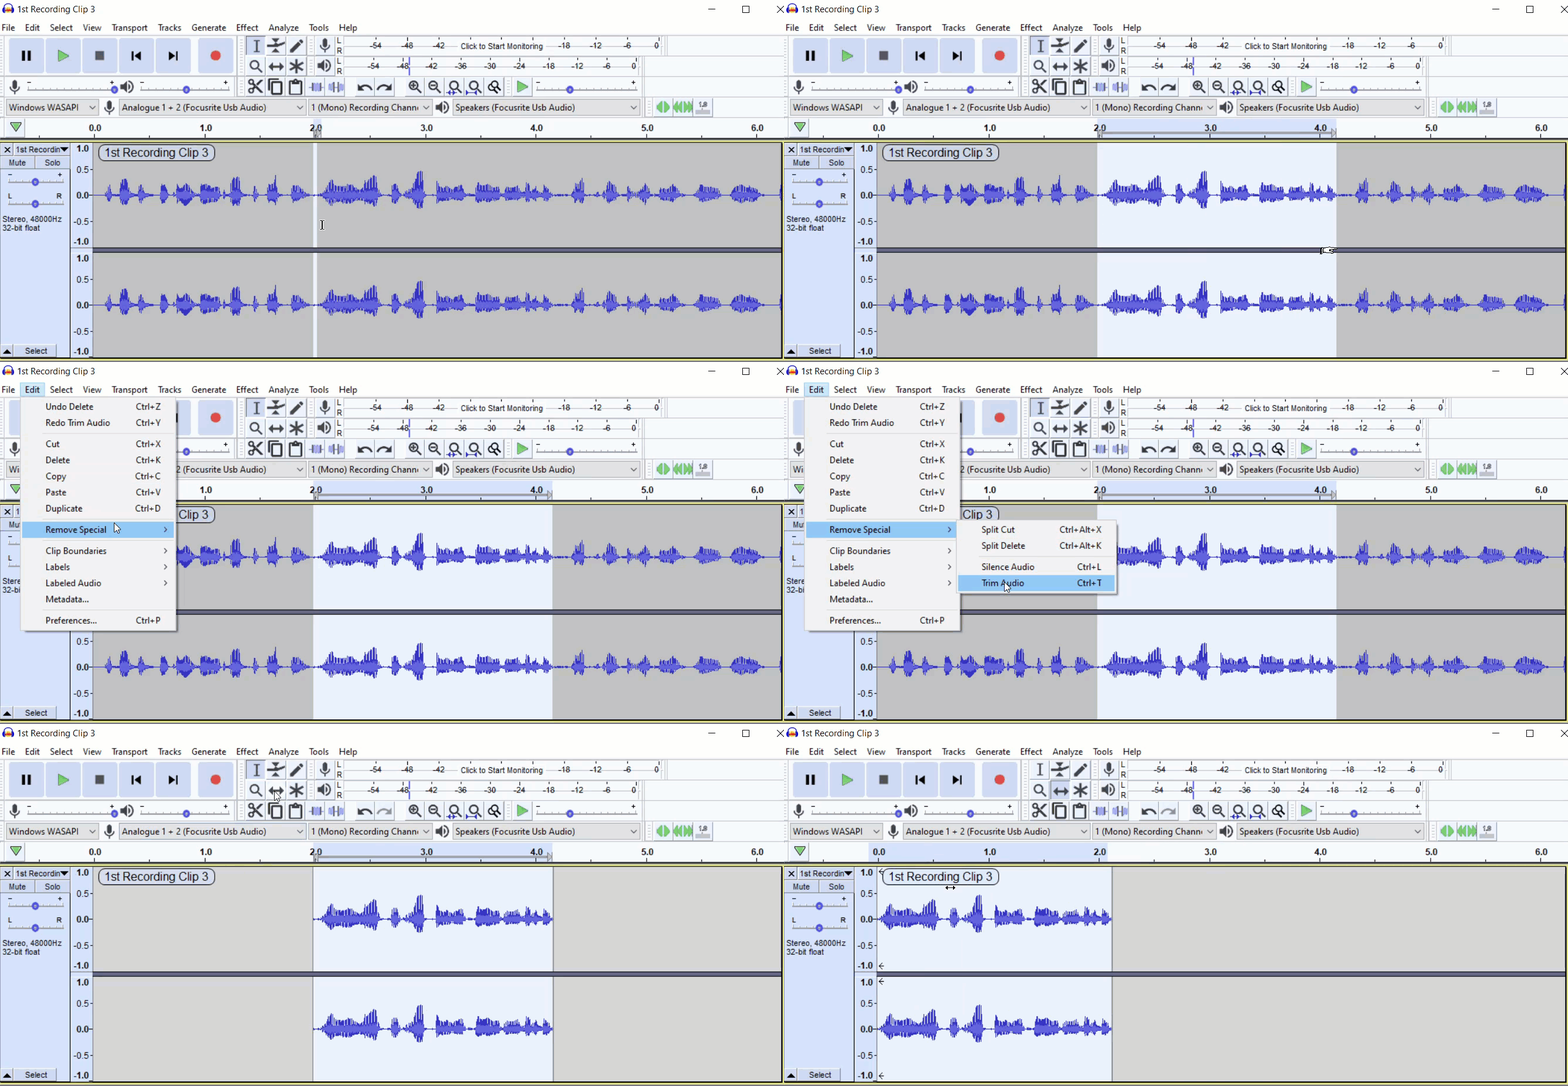
When you trim audio in Audacity, it removes everything except what you have selected. So if you only want to keep a certain piece of audio, the ‘Trim Audio’ option will cut off everything else. See the following example:

As you can see, there is a huge difference between trimming and cutting!
After trimming the audio, you can move it back to the beginning of the track by using the Time Shift Tool.
Conclusion
As you can see, both cutting and trimming audio within Audacity are quite easy, and can be done with only a few keystrokes.
