Is there a filter over a photo that you want to remove?
While filters are very popular on applications like Snapchat on Instagram, sometimes you want to have a copy of the original photo too.
Thankfully, there are ways to remove a filter and even stickers quite easily, and it only takes a few moments to carry out. This is true regardless of where the filter was applied – whether it be through an app like Instagram, or using your phone’s built-in filter options.
In this article, I’ll be going over each possible method to remove filters from a photo!
How Filters Actually Work
Before we begin, it’s important to understand how filters actually work.
Many people falsely believe that filters are applied ‘over the top’ of a photo – that the original photo is still there underneath, waiting to be uncovered. However, this isn’t exactly true.
Instead, filters work by actually changing the color of individual pixels that make up the photo. After all, technically a modern photo is just millions of pixels, each one made up of one of over 16 million colors.
When these changes are made, they are ‘baked in’ to the photo – the originals are gone, and are irrecoverable. Thankfully, because we know how it works, all we have to do is figure out what was done, and then use software to reverse it.
For example, let’s say a filter changed the color temperature to be slightly more orange across the entire photo. If we take that photo with a filter and then go in the opposite direction – making the color temperature more blue by an equal amount, we can get back to the original.
So, when it comes to removing or reversing a filter, all we need to do is figure out exactly what change was made to the colors, and then do the opposite of that to bring the original photo back.
If that doesn’t make much sense yet, don’t worry. Thankfully, modern photo manipulation software is powerful, so this thankfully isn’t that hard – though it does take some trial and error.
How To Remove A Filter From A Photo
Now that we have an understanding of how filters work, let’s look at some ways we can go about removing the filters that have been applied!
1. Using Color Altering / Photo Processing Tools

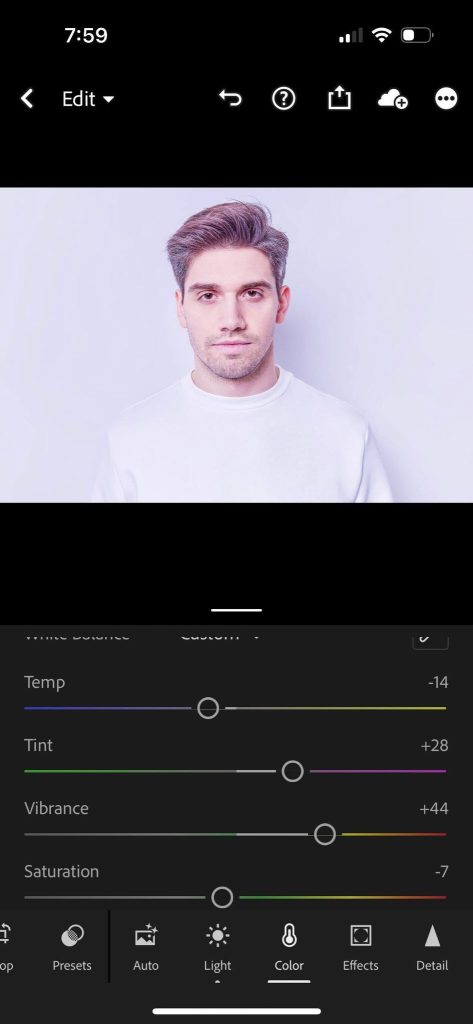
For traditional filters that simply change the color or tint of the photo, the easiest way to remove them is to use color altering tools
The most powerful photo processing tool available is called Adobe Lightroom, which runs on your computer.
Unfortunately it is paid software, and requires a subscription which costs $9.99 a month.
However, there is also software that runs on your phone, such as Adobe Lightroom’s mobile version, or free apps like Afterlight or Snapseed. While not boasting all of the same features and power that the PC version of Lightroom has, they should all still be more than enough for our purposes.
When you import a picture into one of these apps, you’ll be presented with a ton of different options and sliders, each that allow you to manipulate the photo in different ways.
The ones that you’ll want to pay the most attention to are:
- The color temperature of the photo. Many filters make the photo appear more blueish, or more orangeish.
- The vibrance and saturation. If the colors in the filter are popping out, you’ll want to decrease these. Or, some filters decrease these themselves to give a more faded and washed out look. In these instances, you’ll want to increase the vibrance and saturation.
- Color-specific sliders. Most photo processing apps allow you to increase or decrease specific color groups, like the reds or greens within a color. If a filter added a tint over the picture, find that color and decrease it until it starts to look more normal.
Unfortunately, there is no magic solution. However, by playing around with all of the various options, you can usually get the photo looking almost identical to the original picture, before the filter was added.
So, this is an extremely effective way to delete a filter from a photo, that only takes a few minutes to carry out!
2. Using An Eraser App Like Retouch
If the filter was applied to a specific section of the photo, or you want to erase a sticker that was overlaid on top of the picture, this can be done by using specialized apps like Retouch.
Just like filters, stickers are ‘baked into’ the photo once they’re applied, and the photo has been posted. Unfortunately, this means that the original data behind the sticker is completely lost, unless you also have a backup of the original photo.
However, we now have tools available that can use AI to try and ‘guess’ what was behind the photo, and fill it in. While these tools are primarily used to delete objects from the background of photos, they can also be used effectively to remove stickers as well.
In this example, I’ll be using an app called Retouch. However, there other apps available, as well as websites like Magiceraser.io that can do this as well.

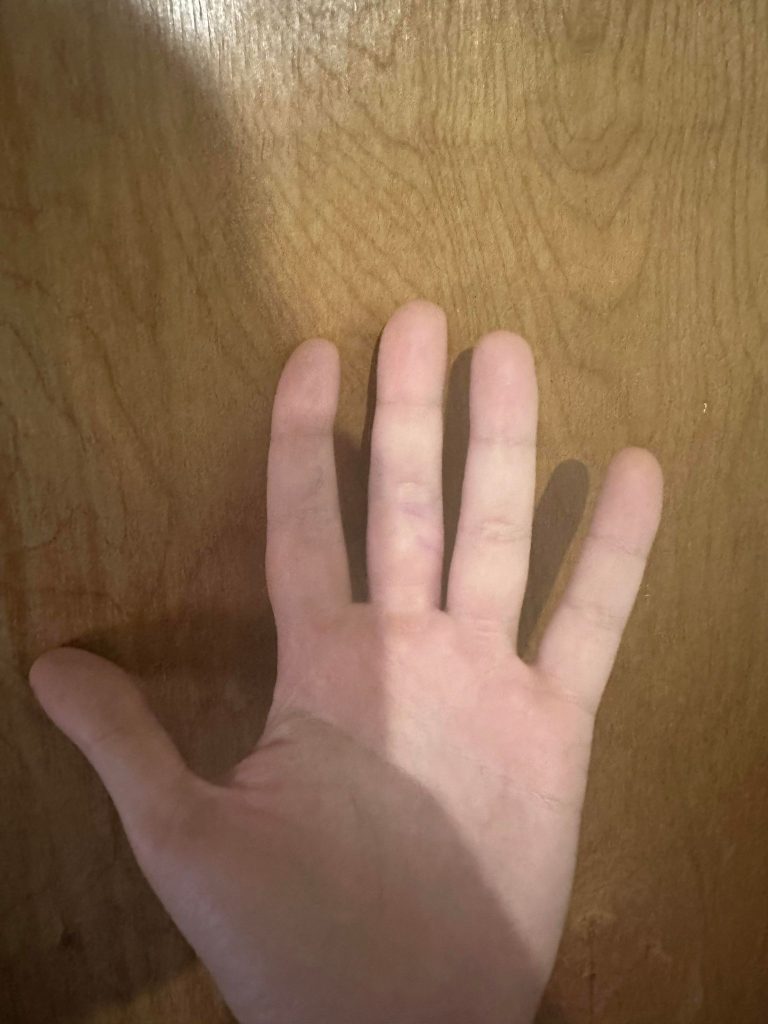
To start, I’ll use this picture of my hand in front of a door, to showcase how it works.
In this example, my hand is what I want to remove – showing the wood behind it.

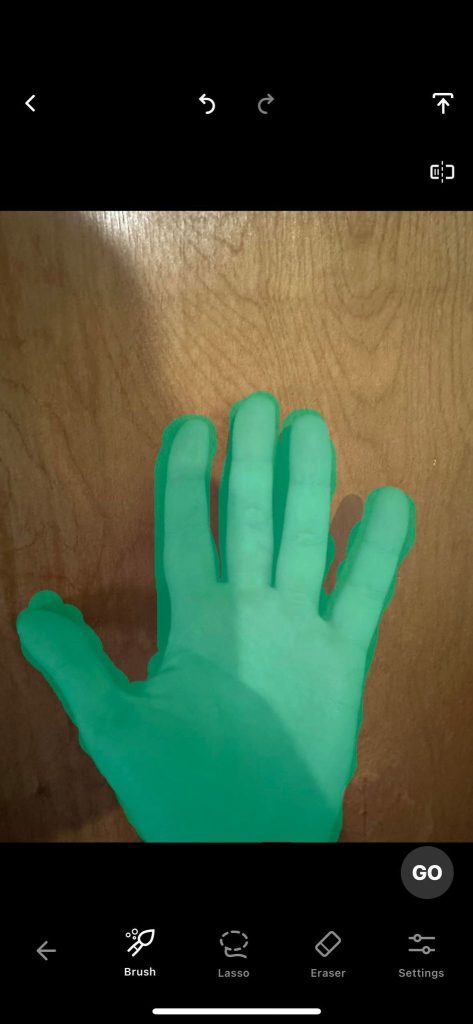
The way this app works is you use a paintbrush to fully color the object, sticker, or filter that you want to remove.
So, you can see that my hand has been fully colored using the app’s built-in brush.
Next, all I have to do is click the go button, and…

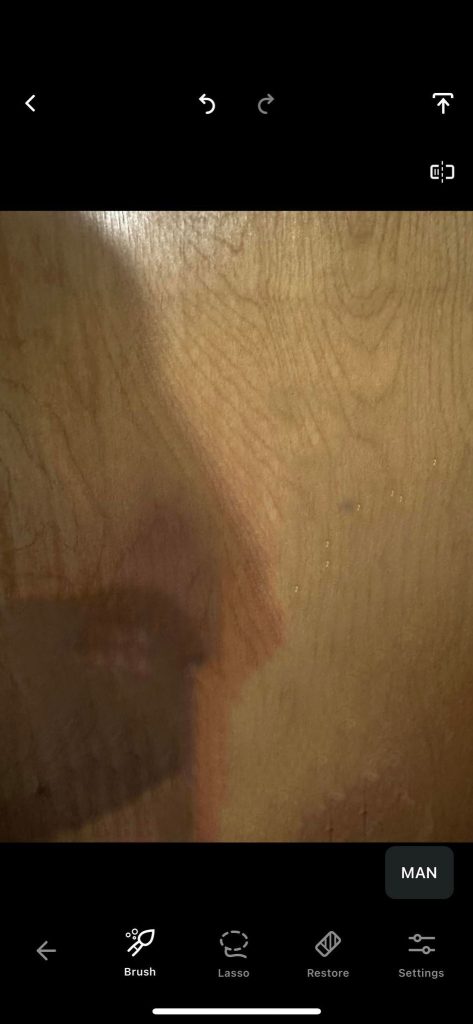
My hand is removed!
The app tried to ‘guess’ what was behind my hand by looking at everything else around it.
While it doesn’t do a perfect job, it is surprisingly good at handing a lot of situations. I specifically chose wood to highlight where it falls short. Wood is very complex with all of the natural rings and dark lines, so to a trained eye you can see that this photo was indeed manipulated.
Most people however won’t notice – especially for simpler backgrounds!
Again, the app has to guess what’s there – it can’t magically bring back the data that was overwritten when the sticker was applied. However, it’s worth trying out – the results can actually be pretty good!
Always Keep A Backup Of The Original Copy, Before Applying The Filter!
When applying filters or stickers to your own photo, the best thing you can do is to save a copy before you apply filters and stickers.
As mentioned already, it can be difficult to get the original photo back once the effects have been applied.
Remember, when you have the original, you can always make copies and apply additional effects later on. Once you’ve destroyed the original however, your options become much more limited.
So, in order to make things easier for yourself and give yourself options, always make sure to save the original. You will thank yourself for it later!
Conclusion
Thankfully, advanced photo processing software is capable of moving most color-based filters that are applied by apps like Snapchat or Instagram.
However, removing stickers are much more challenging, as the stickers are technically ‘baked into’ the photos. So, software has to try and guess what was actually behind them, as the original photo is gone forever. So, always make a backup of your originals before adding any filters or stickers to them.
I hope that you’ve found this article helpful, and you’ve managed to remove the filter that you were trying to remove. If you have any questions, please ask them using the comment form below.
Wishing you the best,
– James McAllister
