In order to better record and edit audio within Audacity, it’s important that we understand what we’re looking at.
Fortunately, Audacity gives us a lot of information just in the waveforms alone. We can use this information to create better quality recordings, reduce editing time, and gain a full picture of our recording at a glance.
Let look at each piece of information now!
Audacity Waveform Display Settings
First things first, you should know that there are a few different ways to visualize your audio in Audacity.
You can change these by clicking the little arrow next to the track name.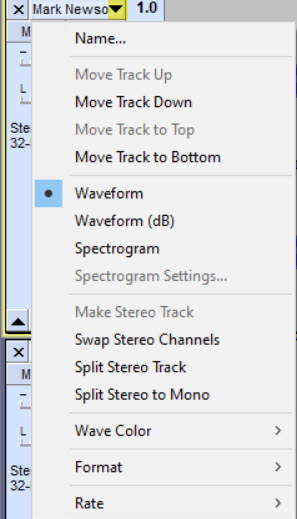
Most notably, there is a selector for ‘Waveform’, ‘Waveform (dB)’, and Spectrogram. There is also an option to change the color of the waveform from blue to something else, which can be useful if you are utilizing a lot of tracks within your Audacity project.
Waveform: This is the default, and it displays the waveform amplitude (loudness) on a linear scale.
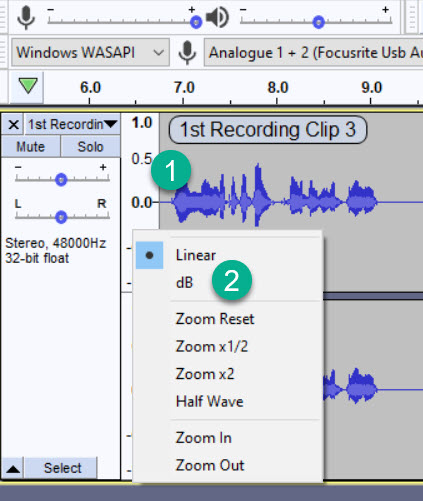
Waveform (dB): This displays the waveform amplitude on a logarithmic scale, measured in decibels. This may more accurately reflect how volume is actually perceived – where a difference in 10 decibels is commonly agreed to appear half (or twice) as loud.
Note that in certain versions of Audacity, the Waveform (dB) setting may appear to be missing. In this instance, you can access it by clicking the units of measurement next to your track, then selecting ‘dB’ as pictured below:
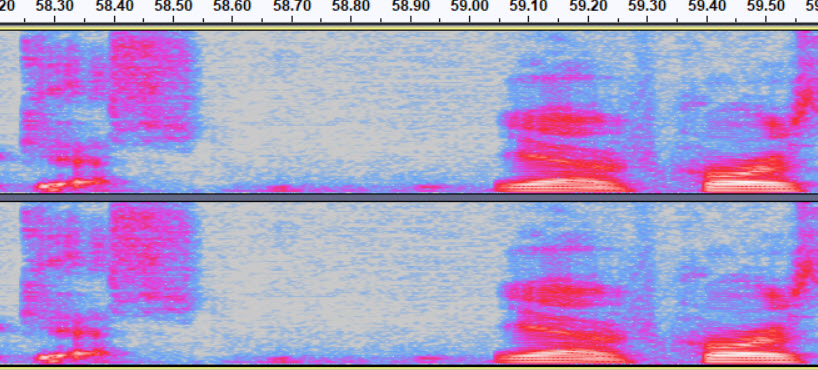
Spectrogram: This visualized amplitude across frequencies. Most people recording dialog will not get much use out of it. Here is a picture:
How To Read An Audacity Wave
Alright, now that we are familiar with the different ways to display sound within Audacity, let’s look at how to read the waveforms. For this example, we’ll be using the default ‘Waveform’ setting, as this will be the option that most people are familiar with.
There are three things to pay attention to here.
The first is the overall size of the waveform. This represents the amplitude, or the volume of the recorded audio. The larger it is, the louder the audio.
The second is the dark blue audio. These are the peaks – the loudest parts.
The third is called the average RMS, and it is essentially an average volume. This is about what your ear perceives.
Keep These In Mind While Recording!
Waveform Size
There are a few things you’ll want to pay attention to, both as you record and while editing.
In Audacity, if the wave hits the top, it will do something called clipping – distorting the sound and causing it to sound bad. Here is an example of clipped audio (warning, it might be loud!)
It is usually good if the waves are large, but they should never hit the absolute top while recording. You should record at a level that accounts for variations in volume while talking. For example, any exclamations or moments of passion can cause you to speak more loudly.
If you are already hovering near the top, these may push you over the edge and cause the audio to clip.
You can read more about prerecording checks to keep in mind by clicking here.
Variation
The second thing you’ll want to pay attention to is variation over time.
For example, you may start your recording with the microphone positioned properly, then unconsciously pull away from it as you start to relax. This will be evident on your Audacity timeline, as the waveforms will start to appear smaller.
The result? Listeners will have to turn up their speakers to match the same volume as when the recording started.
However, if you notice this while editing, it’s important that you select the parts out and even everything out.
Too many podcasters start out nice and loud, gradually get softer, and adjust their microphone to compensate.
What ends up happening for the listener is that they turn their speaker up to an appropriate level, then are blasted with extremely loud audio once you reposition the microphone.
Therefore, you’ll want to make sure that the audio levels are fairly consistent while editing to avoid something like this from happening.
Background Noise
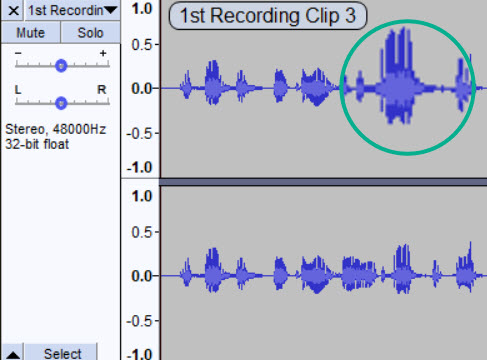
Finally, looking at the timeline can indicate areas that contain background noise, breaths, mouth clicks, electrical interference, or other undesirable audio artifacts that you don’t want in your recording.
Take a look at this picture:

You can see here on the left that we have normal dialog. To the right, you can see a small, solid blue line. This is constant fan noise being picked up from the microphone. All the way on the right, the fan has been turned off, and the audio is near silent (as it should be).
If you’re not talking or you’re in between sentences, a quick look at the timeline will indicate if stray sound has been picked up. This can be edited out later for a cleaner recording.
Note that a small level of background ambience is normal. It can sound unnatural if the audio is completely quiet – especially if it randomly gets silent where you edit it (for example, if you silence a section instead of cutting it out.)
In this instance, copying in a piece of ‘room noise’ from a different part of your recording can help fill the gap.
How To Change The Color Of Audacity Waves
We touched on this briefly earlier, but I wanted to mention it again here.
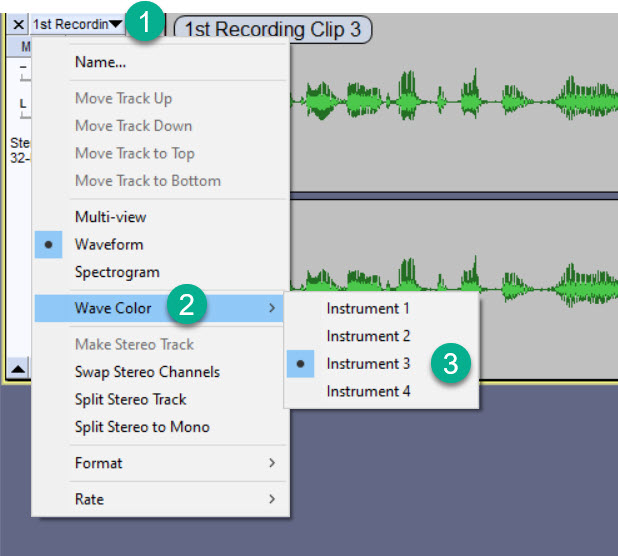
The color of Audacity tracks can be changed by opening the track settings, hovering over ‘Wave Color’, and then choosing one of the four options available.
Note that these are all labeled Instrument 1-4, as Audacity used to be primarily for music.
Instrument 1 = Blue
Instrument 2 = Red
Instrument 3 = Green
Instrument 4 = Black
When working with a large number of Audacity tracks in a multi-track session, changing the track color can help you easily visualize the different tracks, making it easier to stay organized.
Conclusion
Although the waveforms may seem quite simple, there really is a lot to them!
By having a full understanding on what each aspect represents, you can record and edit more productively, saving you time and leading to higher quality recordings.
I hope you’ve found this tutorial helpful. Be sure to check out my other Audacity tutorials for more useful tips and tricks!

When recording how do I make the waveform continue to display to the end of the record. currently it shows for only about half a song then stops visibly feeding, although after the whole record has recorded I can zoom in zoom out as usual.
Des(Quote)
Hi Des, and thank you for your comment!
What a strange issue! Do you mean that the audio waveforms can be seen part way through your recording, but they don’t display in the later half of it? The audio still plays though, correct? Or is this just happening while recording?
This sounds like a bug, so the first thing I’d do is check for updates to Audacity. You can do this by going to the Help menu and then clicking on ‘Check for updates.’
You may also get Audacity to regenerate the waveforms by duplicating your audio to another track, or exporting the audio, then reimporting it back in.
I haven’t heard about this happening before, but I hope this helps! If you are able to upload a screenshot and link it here I might be able to take a deeper look.
James McAllister(Quote)
Cheers James. Answer in order of your questions….
Q1. Nearly. The waveforms generate as normal from the left hand side (LHS)of the Audacity window towards the RHS. Then when the new part, the generating part of the waveform hits the RHS of the window, the visual waveform just freezes. However the music continues audibly and the above horizontal sliders keep moving through their colour ranges as normal.
From memory, when I used to record my LPs about 6 months ago, as the new part of the waveform hit the RHS of the window, would appear to jump forward say 1 minute of recording time giving the waveform a piece of 0 dB line to start drawing on. In short, this jump forward no longer seems to be happening. But after the whole side has recorded and I select all and zoom out, The full record waveform is there and captured. I declick the tracks, split and name them then export as multiple MP3s as normal.
Q2. Yes the audio still plays through as normal. Good quality.
Q3. It just seems to be a recording moment issue.
Q4. Checked for Updates. No new updates available, so my Audacity was up to date.
Q5. Audacity is recording absolutely fine. So I won’t try getting my old brain to regenerate and duplicate waveforms etc. I was thinking there might be a setting which automatically extends recording time or similar which I should amend.
Q6. I don’t think a screen shot would show what happens, it really needs to be a screen video and a bit beyond me.
Thanks for looking at this. Regards Des
Des Howard(Quote)
Oh, I think I understand what’s happening now!
Two things that might help
1. Go to Edit -> Preferences, and then click on the ‘Tracks’ tab. Make sure that ‘Auto-scroll if head unpinned’ is checked. If it’s unchecked, this will prevent Audacity from automatically jumping forward when the audio hits the right hand side of the screen.
2. If the issue still happens even while that box is checked, exit the preferences and go to the Transport tab across the top of the screen. Hover over ‘Transport Options’ and check ‘Pinned Play/Record Head.’ This will keep the cursor in the middle of the timeline, but continuously scroll it forward during recording and playback.
If this isn’t desirable or it still doesn’t work, I would recommend backing up your files and completely uninstalling / reinstalling Audacity.
If this works, could you please write back here to let me know? That way, other people that experience the issue will hopefully find this page. Thanks Des!
James McAllister(Quote)