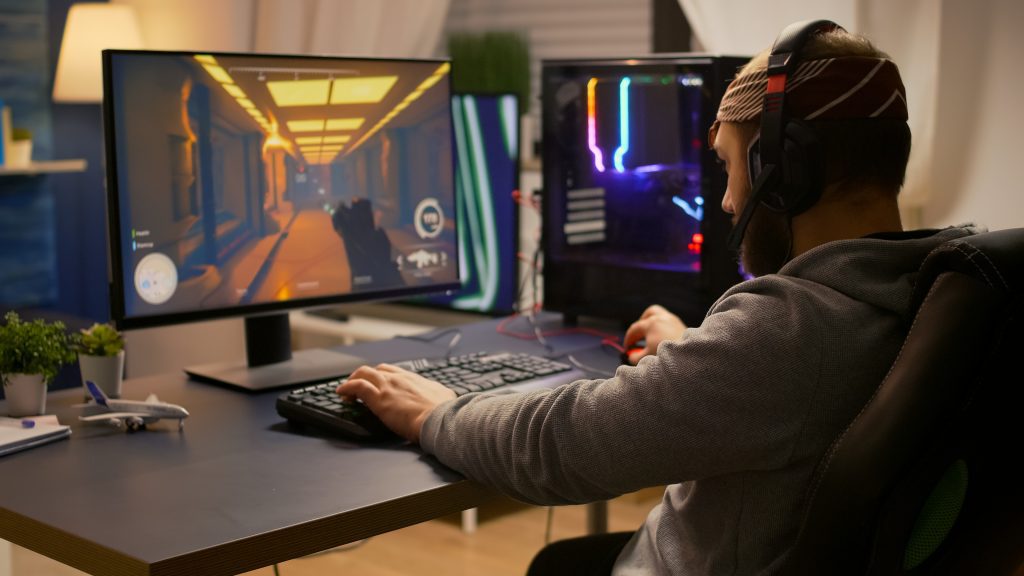
Are you looking to allocate more of your system’s RAM to a game, in order to improve its performance?
RAM management is important, especially if you don’t have a lot of it to spare.
So, in this article I’ll be showing how you can prioritize the game you’re playing, utilizing as much RAM as possible for it, rather than other processes that may be running in the background, but aren’t as important.
While this article will mainly be geared towards Windows computers, some of the advice will apply to Mac and Linux as well.
An Important Note – Windows Uses What It Needs
Before we go any further, it’s important to understand how Windows actually allocates RAM towards specific processes running on your computer.
Let’s say you had a limited amount of RAM – 8 gigabytes for example, and all of the software running on your computer required more than that.
While Windows could simply refuse to open new software or crash other software that’s running, this would lead to a poor experience, and be very frustrating to users.
Instead, Windows using something called a pagefile, where it temporarily ‘offloads’ the contents of your RAM until it is needed again. On other operating systems, this may also be referred to as the ‘swap’ file.
So, for example, let’s say that you were browsing the internet with lots of tabs open, then decided to open up a game. You then continue playing the game for a lengthy period of time, without switching out of it.
Windows will automatically take the RAM that was being allocated towards your internet browsing, and write it to your hard drive or SSD, freeing it from RAM. This automatically allows the game you’re playing to take advantage of the extra RAM that’s just been made available.
When you’re done playing, Windows will reload data from the pagefile on your SSD or hard drive, back into your RAM. This will take some extra time (since even SSDs are much slower than RAM), but it will allow you to keep more programs open, even if you normally wouldn’t have enough RAM to support them.
The point I’m getting at is this – Windows is already great at maximizing the RAM available, for whatever it is you’re doing at that moment. While the fixes I’m about to share should lead to a noticeable increase in performance, the difference may not be as dramatic as you might expect.
With that out of the way, let’s look over how you can directly allocate more RAM to the game you’re playing!
Note: This holds true for games launched by Steam, as well. Windows allocates RAM to Steam and the game you launch with it separately.
Prioritizing Your Game Via Task Manager
Although Windows will allocate RAM efficiently and automatically, you can still specify exactly which processes on your computer should be prioritized.
This means that if you prioritize your game, you can ensure that Windows will ensure that your game has all the RAM it needs, even if it has to take it from other programs when it otherwise wouldn’t.
So, how do you allocate more RAM to a game?
Just follow these steps!
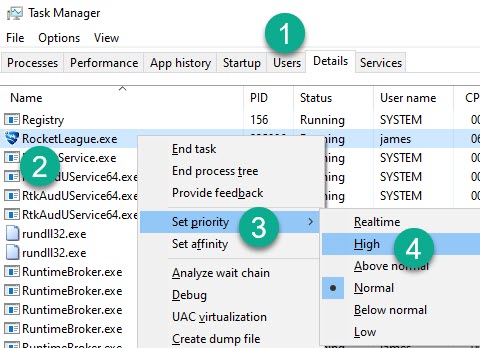
- Open Task Manager, by opening up the start menu and typing in ‘Task Manager’, or using the shortcut Ctrl+Shift+Esc.
- On the menu running across the top, click on ‘Details.’
- Find the process for the game you’re running. Often times, this will be the game name, or in some cases it may be abbreviated. You may also recognize it by the icon next to the process name.
- Right click on the process name to open an additional menu.
- Over over ‘Set priority’ and change the priority from ‘Normal’ to ‘Above normal’ (recommended) or ‘High.’
Although the ‘Realtime’ option is technically even higher priority than setting it to ‘High’, it is never recommended to select the realtime option for a game. Instead, this should be reserved only for core system functions that will make your computer unusable if they aren’t able to run – even more important than your keyboard and mouse!
Note: You shouldn’t need to change the priority of Steam or its processes, just the actual game process you’re running. The same can be said for Origin, Battle.net, and other popular game launchers.
Windows’ Pagefile, And Why It Should Be Kept On An SSD
Although we now know how to prioritize certain tasks in Windows, the hardware you’re using on your computer also plays an important role – especially if you don’t have a lot of RAM to spare.
As mentioned earlier, computers write data to a pagefile or swap file when necessary. When that data is needed again, it is loaded from the file back into RAM.
This process takes time, and is limited by the transfer speeds of the drive in which the pagefile or swap file are located.
Since solid state drives (SSDs) are much faster than hard drives, it’s recommended to upgrade to one if possible, as it will drastically increase the time that this process takes.
In fact, this will lead to an even more noticeable improvement than increasing your RAM speed would!
If upgrading to an SSD isn’t possible, you may also consider purchasing a faster hard drive as well.
Don’t Forget To Close Things That Aren’t Being Used!
Finally, you should be mindful and conscious of what you leave open in the background.
Most games – even modern AAA games, do not require that much RAM to function at their highest possible level. Instead, bottlenecks typically occur based on your computer’s CPU, or graphics card.
One thing you can do to help however, is to free up additional RAM on your computer before you start playing the game.
Yes, Windows will write to the pagefile, but it’s even better if you free up RAM beforehand by closing unused processes, regularly closing internet tabs you no longer need, and regularly restarting your computer to end processes running in the background.
Easier said than done of course – I have more than 30 tabs open as I write this article, haha!
Conclusion
Although Windows is great about allocating RAM as needed, you can prioritize the game you’re playing through Windows Task Manager by following the steps above.
This will ensure that Windows prioritizes it above other applications, giving you a potential speed and performance boost.
I hope that you’ve managed to get the priority changed, and you’ll soon see a performance boost while gaming.
If you have any other questions about improving your FPS or how Windows manages RAM, ask them below and I’ll get back to you as soon as I can.
Thanks for reading,
– James McAllister
