If you’ve been following along my Audacity series so far, you may think it’s silly to talk about saving and closing projects before we even edit anything. Well, we know that audio editing takes time, and we don’t always want to do it one sitting.
Saving Audacity Project Files
Therefore, it’s important we have a way to be able to save our progress and pick straight off where we began. Besides, it’s good to get into a habit of saving your work periodically in case your computer crashes, the power goes out, or some other catastrophe happens that would cause you to lose your work.
Now it’s important to understand how Audacity saves files. When you import your audio and make edits to it, the original audio file isn’t changed in any way. That original audio file will be exactly the same when you start as when you finish.
Instead, Audacity makes a second copy, and saves all the changes you made into an Audacity Project File. You can recognize these because the logo for the file will be the Audacity logo, and the files will end in .AUP or .AUP3 instead of .MP3, .WAV or whatever your original audio file was.
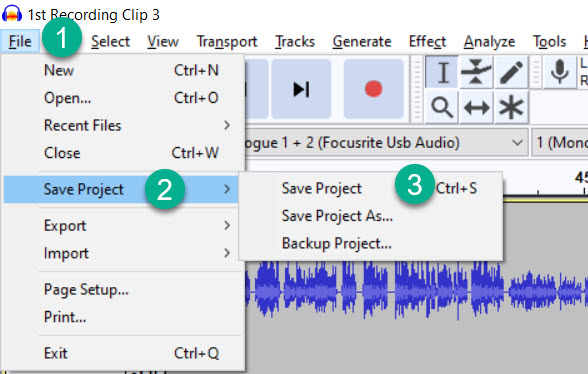
Saving a project in Audacity is really easy. All you have to do is go up to ‘File’, then click Save. Give your project a name, and you’re all done. This will save all of the edits and adjustments you’ve made to the audio, and you can open it back up and continue editing at any time.

Note however that this doesn’t actually make an audio file that you can distribute. To do that, you need to do something called exporting the file, which I will discuss in another tutorial.
Long story short, if you are still going to be working on a project, you should save it. If you’re done and you want the completed audio, that is when you click through to the export options. Although you should still probably save the project anyway, all things considered.
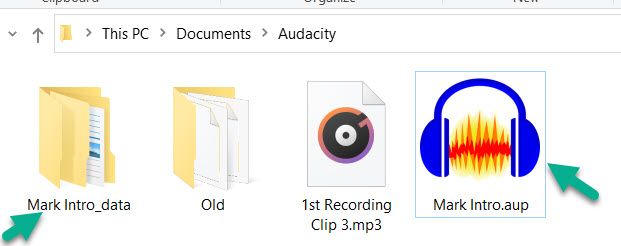
Once you save your project, it will create two things. The first will be the .AUP file, and the next will be a folder with your project name, and underscore, and the word data. So as you can see here, we have the “Mark Intro” Audacity project file, and we have a folder called “Mark Intro_data”. It’s very important that these two things are kept together in the same folder. If for example, you move the project file to a separate folder without also moving that data folder, the project will no longer be able to be opened. So, if you’re going to move one, make sure that you always move the other as well.

Note: Since Audacity 3, this folder may no longer be created. You should still maintain a habit of keeping important files together.
Opening Audacity .AUP or .AUP3 Project Files
Now that we’ve talked about saving, let’s talk about opening. Opening a project is just as easy, and there are a few ways to do it.
First of all, you can just click on the .AUP file in whatever folder you’re keeping it in, and it should automatically open it with Audacity.
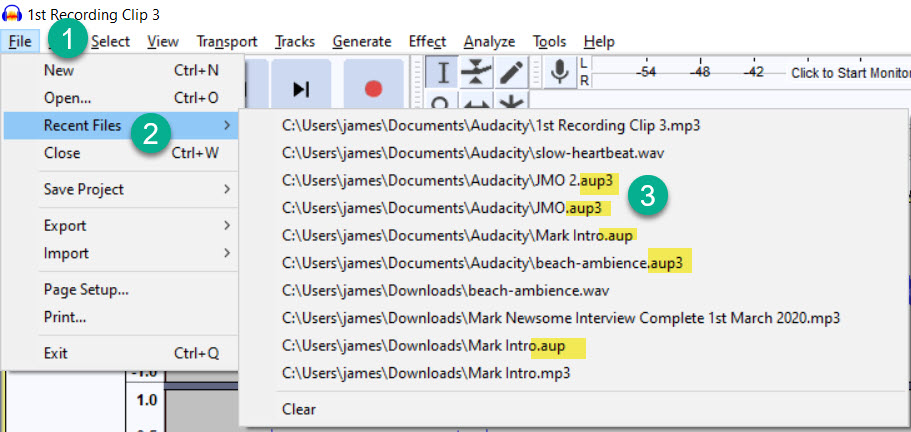
Alternatively, you can open Audacity, and go down to the ‘Recent Files’ section. You will be able to recognize your Audacity project because it will end in .AUP instead of a regular audio format like .MP3 or .WAV.

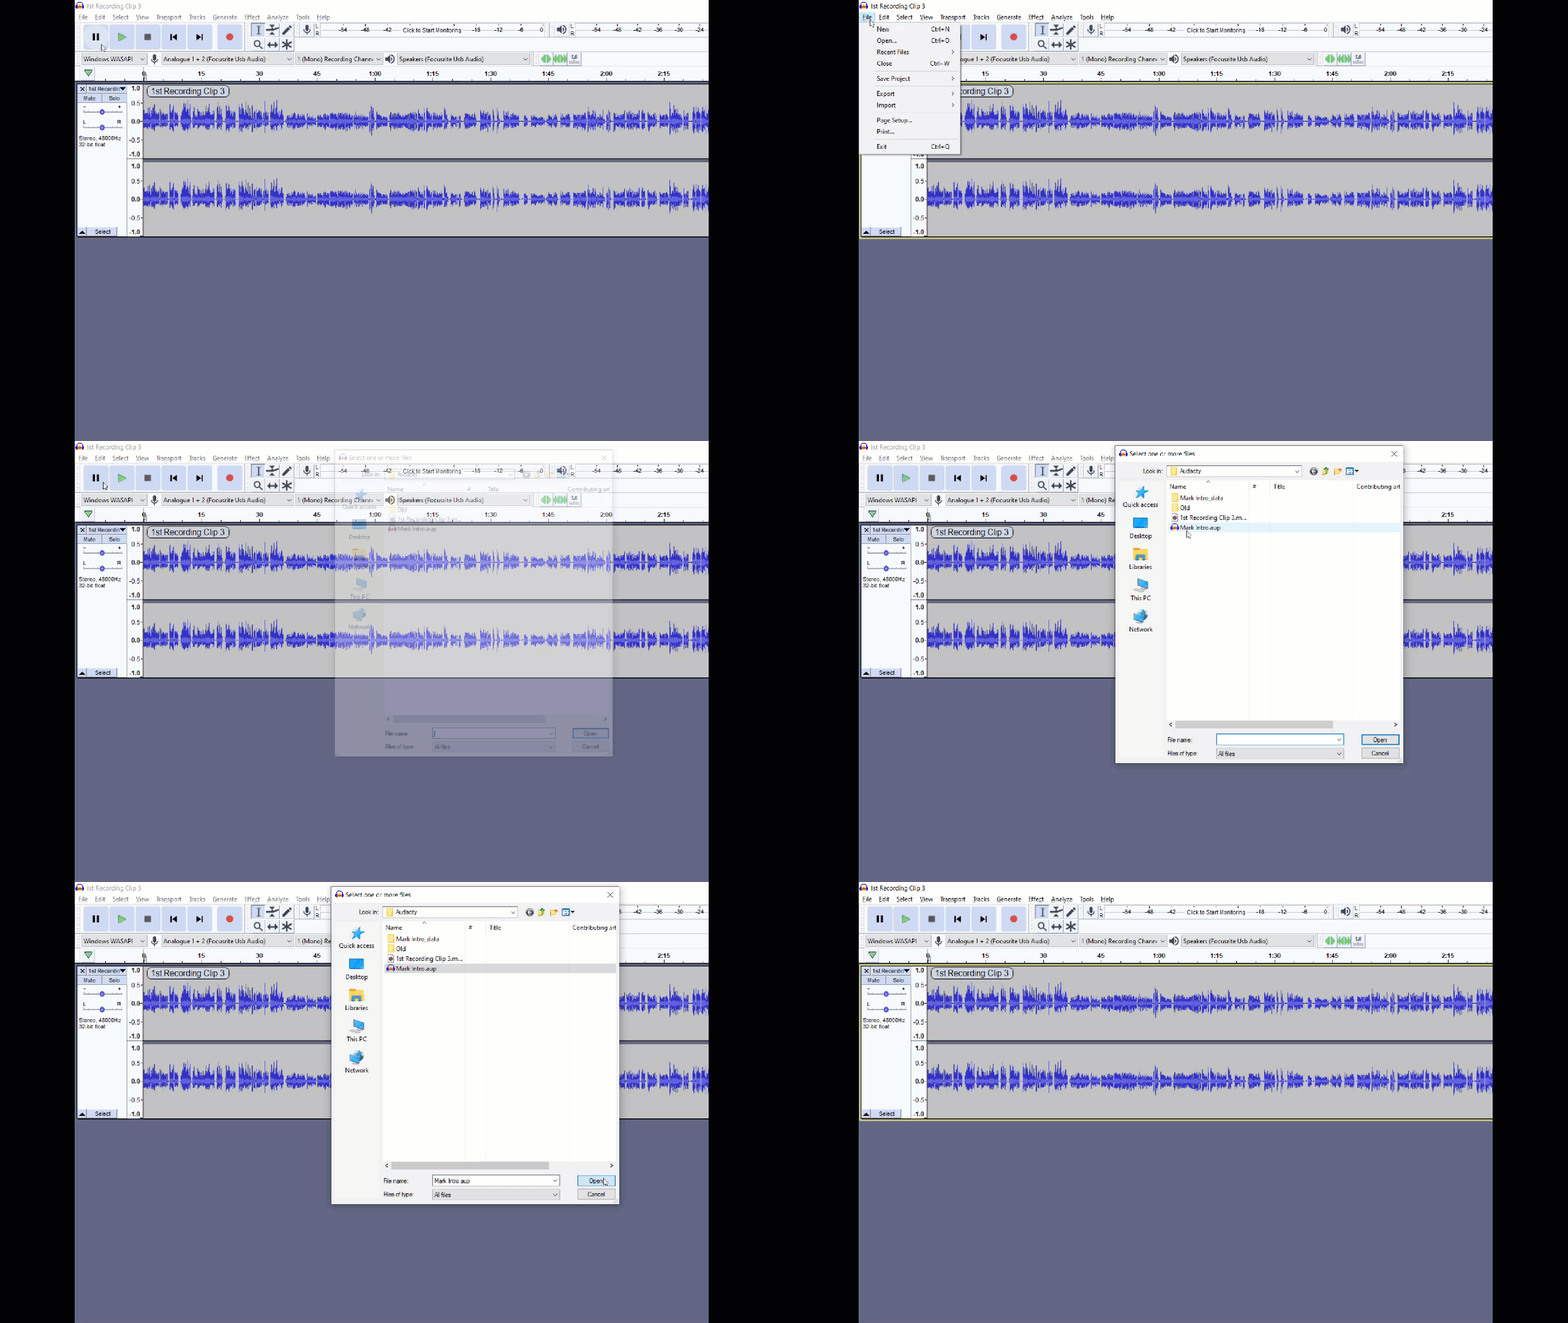
If your project is no longer in the recent files section, say if you worked on a bunch of other things since then, you can also open the project file, the same way you would an audio file. Go to the file tab, click on open, then search for the project that you’re looking for. Click on it, and it should open up.

Conclusion
Working with Audacity Project Files (.aup for older versions of Audacity, or .aup3 for Audacity 3) is quite simple.
The only thing to remember is that there is a difference between your original audio files (commonly ending in .mp3 or .wav) and Audacity project files. Audacity project files will have all of your edits and changes, whereas the original audio files will not.
I hope that you’ve found this tutorial helpful. Be sure to check out all of my other Audacity tutorials for more Audacity lessons!
