Whether you’re watching other people’s videos are recording your own, low quality TikToks aren’t pleasing to anyone.
Unfortunately on TikTok, users have come to expect a certain degree of quality. And if your videos are turning out blurry or they have poor video quality, chances are they won’t do so well on the platform.
Fortunately however, the problem isn’t usually caused by your camera – in fact, most modern smartphones are more than high enough quality to make viral TikTok videos.
This means that poor quality videos are something you can fix, without needing to buy a new phone.
In this article, we’ll cover everything you need to know about fixing blurry TikTok videos, and how to improve your TikTok quality overall.
How To Improve The Video Quality Of Your TikToks
Creating high quality TikTok videos almost always comes down to a few best practices.
These are easy to implement, and only take a few moments. Yet, they can make a dramatic difference in how your video turns out.
1. Turn Off Data Saver Mode

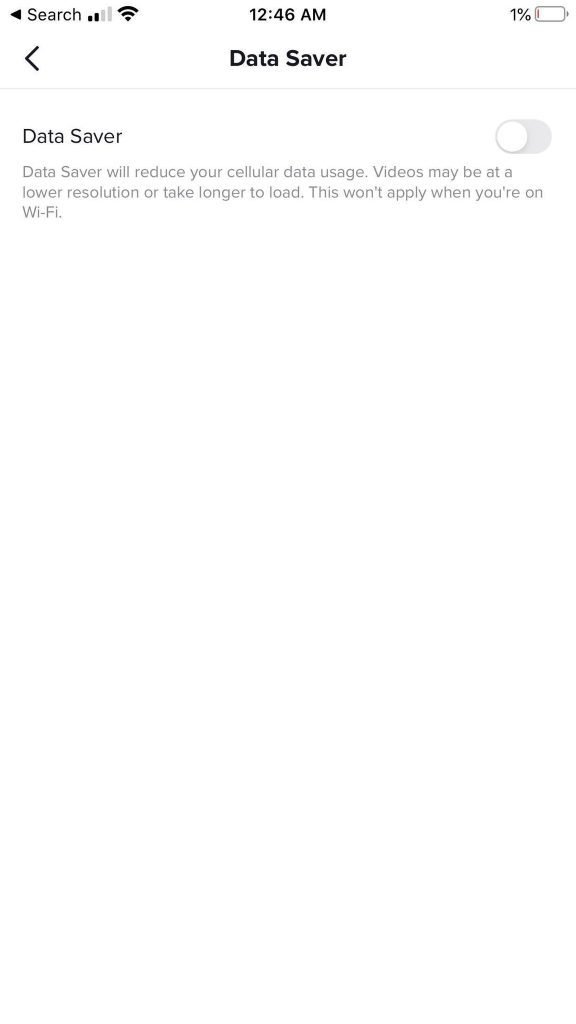
This first one is more for viewing TikToks, rather than creating them. However, if you have Data Saver mode enabled, even your own TikToks will appear to be lower quality (even if they look better to everyone else.)
Data saver mode essentially compresses videos by playing them at a lower resolution. This means that even though the video is available in HD for example, it will play back at a lower quality in order to save cellular data.
This is more of an issue for people who have very limited data usage, or live in an area where streaming data can be slow or expensive.
If you live in an area with good, fast cellular coverage, there is no reason to have it on.
To disable Data Saver mode, follow these steps:
- Click on the ‘Profile’ button across the bottom to reach your profile.
- Click on the three horizontal lines in the top-right hand corner to open your Settings.
- Scroll down to ‘Cache & Cellular Data’.
- Tap on “Data saver’.
- Toggle it to off.
This should turn the data saving mode on, to ensure videos play back at their maximum quality.
Note that if you’re browsing TikTok on Wi-Fi, this will appear to have no effect. This is because Data Saver mode is only activated when on cellular data, even if you previously had it toggled on.
2. Use More Light
If there’s one thing that improves a camera’s quality, it’s light.
Seriously. It makes a big difference.
In fact, even for professional photographers it often makes sense to spend money on better lighting, even more so than a better camera or a better lens! It makes that big of a difference.
This is why videos taken in the dark often look blurry, grainy, or blocky. Light is an extremely critical aspect of helping videos look their best.
Fortunately, you don’t have to go crazy with it. Even a little bit of extra light can make a big difference.
There are a few things you can do for free to introduce more light into your TikTok videos. A few examples include:
- Turning on all the lights in your room if they’re off (obviously.)
- Opening up windows, letting in as much natural sunlight as possible.
- Filming your video where there’s the most light in your room (watch for glare, however.)
- Filming your video outside, if it doesn’t make any difference.
- Using things such as laptops, televisions, or other screens to introduce extra light if you have nothing else.
Of course, if you’re serious about improving the quality of your TikToks, you may consider investing in some cheap lighting equipment.
Something like a ring light can be good for illuminating your face while sitting down, while cheap LED light panels can illuminate an entire room.
Typically, softboxes are the best way to introduce soft, natural looking light that illuminates you evenly, without being harsh on your eyes.
Kits of 2 lights can run for $50 or less and will seriously be one of the best investments you can make into the quality of your videos. Many of them even operate with rechargeable batteries, so you can carry them anywhere around the house you’d like without having to plug them in.
3. Use Your Rear Camera
When filming TikToks, you should always try to use your rear camera if video quality is important to you.
Although the front camera is popular for video calls and selfies, it is usually a much cheaper camera than the one that is on the back of your phone and is not as well-equipped for taking videos.
Rear cameras tend to have a higher megapixel sensor, and can records videos at a higher resolution.
It should be noted though that this gap has been lessened in recent years, as manufacturers have noticed how important the front-facing camera has become to users.
Still, using the rear camera will likely lead to much higher video quality, as that camera is better suited for this purpose.
4. Check Your Camera Settings

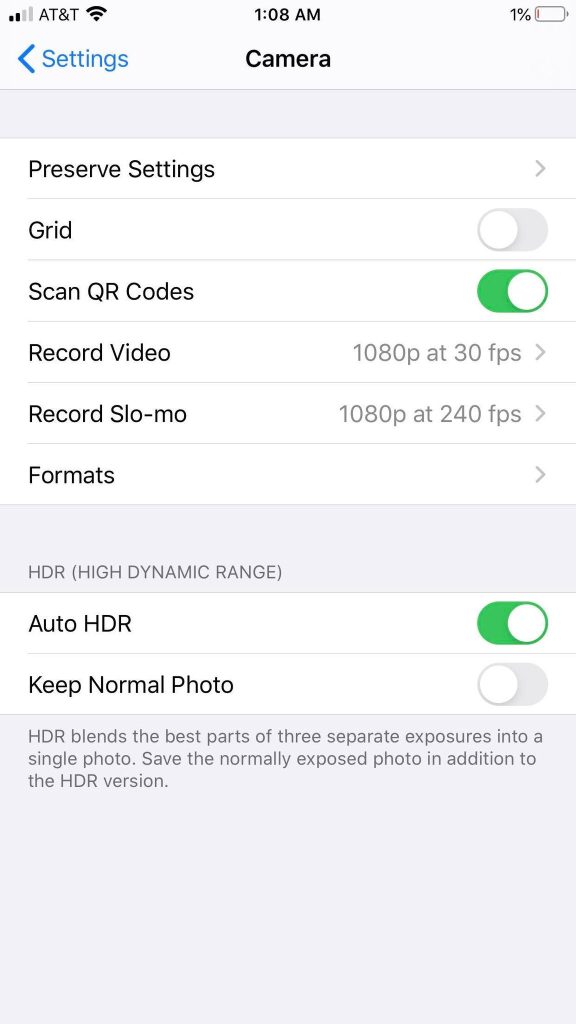
Did you know that you may actually be able to change the resolution in which your camera records videos?
It’s true! In the above picture, you can see that my camera is set to record videos at 1080p, at 30 fps. However, I could actually change it to record in 4k, which is 4x the resolution!
On iPhone, you can change this by going to your Settings app, searching for ‘Camera’, and then clicking on the ‘Record Video’ button as noted above.
While increasing the setting will lead to higher video quality in most instances, it also uses substantially more space on your phone. This should be noted if you record a lot of drafts, because drafts are stored locally on your phone (not on TikTok’s servers) and therefore can quickly take up a lot of space.
On Android, changing your camera settings can vary depending on your device and OS. However, you should be able to find it somewhere within the settings.
5. Buy An External Lens

This one really isn’t necessary for most people.
In fact, if you’re going to make an investment anywhere, it should be on getting a good lighting set up. Unless your phone is extremely old, it already has a good enough camera to record high quality TikTok videos.
However, that’s not to say it can’t be improved!
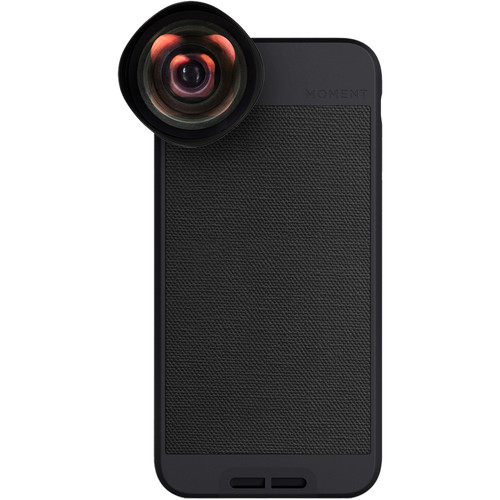
Many people don’t know this, but you can actually buy camera lenses that attach directly to your phone, like this one available on B&H Photo.
Obviously, you probably won’t want to walk around with this thing in your pocket.
However, you can slip it on to record your TikTok videos, enjoy the massive improvement in video quality, and take it off when its not in use.
External smartphone lenses can run as cheap as $20 to hundreds of dollars or more.
Of course, you get what you pay for! Note that even expensive lenses can still produce blurry videos without enough light, so again – invest in lighting first.
6. Film Outside Of The TikTok App
Many professional TikTokers first record their videos outside of the app, then import it into the app when they’re actually ready to post it.
Why? There’s a few reasons.
First of all, some people don’t record with their phone at all. They may record using a professional camera, edit the video using editing software on their computer (such as Adobe Premiere), and then export the video. After that, they do all the final processing on their phone, such as adding text and stickers, choosing their sounds, etc.
Even for those without another camera however may choose to film outside of the app due to the increased control it has.
Your phone’s built-in camera app (or third-party camera apps) may have far more options in terms of how to film the video. You may be able to manually control things like shutter speed, ISO, white balance, exposure, filters, etc, many of which are not available at all while filming within the TikTok app.
Although it can take a bit more fiddling around with camera settings to do it this way, it may ultimately lead to a higher quality video. Therefore, it’s worth spending some extra time to learn how to properly work with your smartphone’s camera.
Conclusion
Producing high quality videos for TikTok doesn’t have to be hard, and your phone’s camera is already more than enough.
Blurry videos almost always come down to a lack of light, or using your phone’s selfie camera rather than the rear camera.
Therefore, by making a few small adjustments to your filming process, you can make a dramatic difference to the final quality of your TikToks.
Do you need any help, or have any questions?
Feel free to share your TikTok handle below. I’d be happy to take a look at your videos and give you any pointers or suggestions to improve your film quality.
I hope that you found this article helpful, and here’s wishing you the best of success on TikTok!
– James McAllister
