Audacity is an incredibly powerful audio editor, and comes with a lot of tools built-in to make your audio sound even nicer.
That’s right – your audio isn’t done as soon as you’ve finished recording it. There are things you can do after you finish recording to improve the quality and make your vocals or dialogue sound even better.
These things only take a few moments to do, and can make a dramatic improvement in the quality of your recording.
So, let’s look at a few things you can do to improve your Audacity audio quality, and make your recording sound even better.
1. It Starts With The Source
Before we get into any sort of post-processing, let’s talk about perhaps the most important factor in your overall audio quality – the source audio.
Your job is a lot easier if you capture the highest quality recording possible when you actually sit down to record.
This means that you do a few things:
1. You record in a treated room that doesn’t have a lot of reflections. Even doing something like filling a room with bookshelves or putting a blanket on the wall can make a dramatic difference.
2. You use the right type of microphone for the job. For example, you wouldn’t use a microphone made for loud live music performance, for something like ASMR or capturing sound effects.
3. You use a pop filter or windscreen to cut down on plosives.
4. You hold the microphone on a stand with a shock mount. Noise made from moving the microphone can be difficult to edit out.
5. You use proper microphone placement for your microphone. This will depend heavily on the type of microphone you’re using – some will require you to be right up close to the microphone, while others may have you 6 or more inches away.
Proper microphone placement is really important for a few reasons. First of all, if you have it closer to your mouth or you speak more loudly into the microphone, the background noise will be more faint in comparison. This means that you’ll need to apply less gain or amplification to reach proper audio levels. Now as you can imagine, when you amplify the sound of your voice, you also amplify the background, so you want to try avoiding that too much.
If you have it too close however, you may experience something called the proximity effect with your microphone, which boosts the low frequencies and can muddy up the audio. Additionally, people may start to hear too many loud breaths or mouth clicks from saliva moving around in your mouth.
The best way to find the ideal placement for your microphone is to trust your ears – utilize Audacity’s live monitoring feature to listen back to your audio in real-time as you speak into your microphone. Then, take a small test recording to see how it sounds.
2. Normalize The Audio
Normalization in Audacity brings the peak audio levels up to the volume of your choosing.
Most of the time, we don’t record exactly to the levels that we may want in the final audio file, which is actually a good thing. If we did, we could accidentally clip the audio – recording it so loud to the point where it starts distorting, and permanently ruin the recording.
Therefore, it actually makes sense to record a bit quieter, with less gain or amplification than we need, and then boost it up when we’re done.
Normalizing audio in Audacity can be done by first selecting the audio that you want to normalize.

Then, go to Effect -> Normalize and wait for the dialogue box to appear.
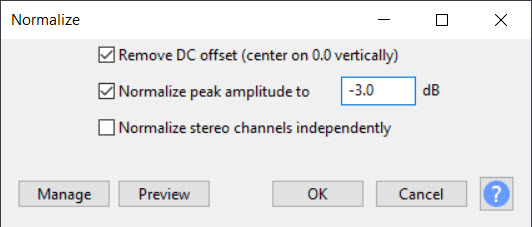
This will bring the highest point in the audio up to whatever level that you set. In this example, we have set the loudest point in the audio to -3 decibels. This is generally a safe zone to keep it in.
3. Reduce Background Noise
Now that you have normalized the audio, you may have noticed that the background noise in your recording has become louder or more prominent.
Thankfully, Audacity has a tool built-in to try and remove as much of the background noise as possible. It is not perfect, but it can go a long way – especially if your background noise is relatively consistent. Some examples would include a fan going in the background, or traffic ambience outside.
Note however that this is an optional step. If the background noise isn’t really that bad, you want to avoid trying to remove too much. This is because the process of removing background noise also removes some of the natural frequencies of your voice, and can make your dialogue sound ‘tinny’ or unnatural.
This is why proper mic placement from the beginning is so important – it can really make the background noise seem pale in comparison.
Anyway, removing background noise in Audacity is simple.
First, you’ll want to select some audio where you are NOT talking. Some people leave extra space at the beginning or end of each recording to account for this.

Next, you’ll want to go to Effect -> Noise Reduction.
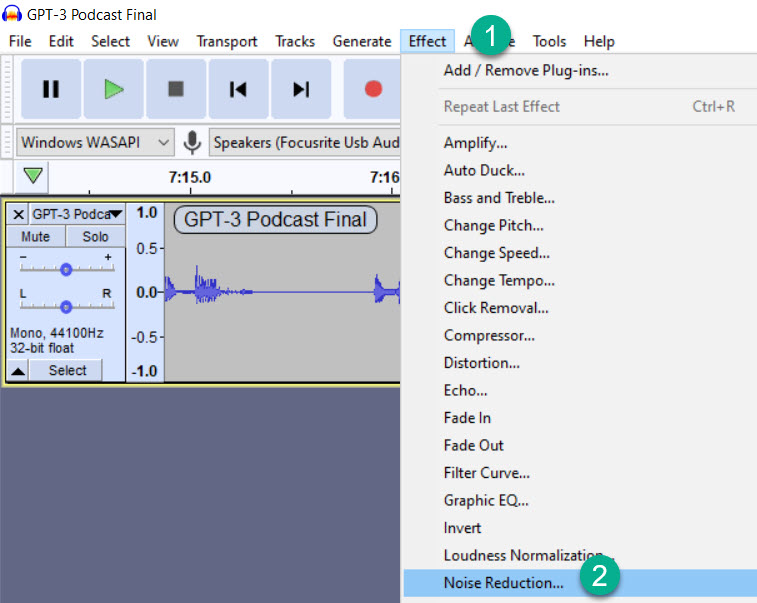
Finally, on the box that pops up, click ‘Get Noise Profile’.

The window should automatically close. But wait, you’re not done!
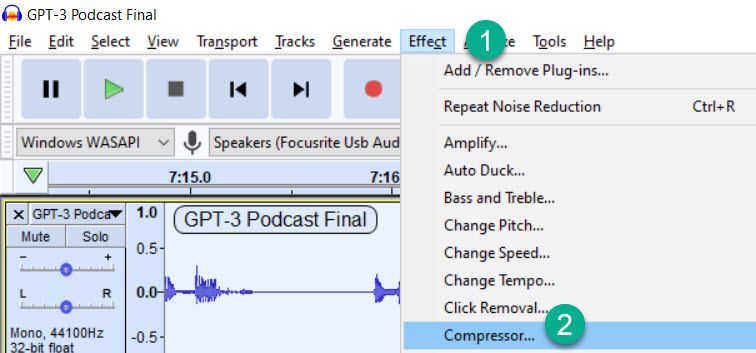
Next, select ALL of the audio you want to remove background noise for. You can select all of your audio by pressing Ctrl+A or by clicking the ‘Select’ button at the top of the Audacity screen, then selecting ‘All’.
Once all of your audio is selected, go to Effect -> Noise Reduction again, just like you did before.
The settings will affect how drastically the noise is reduced. If the default settings don’t work for you, feel free to play around with them a little bit. Some of the best noise reduction settings for me are as follows:
Noise reduction (db): 20
Sensitivity: 5
Frequency smoothing (bands): 4
4. Add Compression
Compression lowers the dynamic range of your audio – meaning there is less of a difference between the quieter parts, and the louder parts. This leads to a tone that is more round, warm, and less harsh.
Let’s say you want your audio to average out to around -15 decibels. If you have a block of sound that is around -10 decibels, compression will take that louder audio, compress it, and make it quieter. For example, instead of it being -10 decibels, it may end up being compressed to -12.5 decibels instead.
It is still louder, but it is less loud than it would be without compression.
This keeps the vocals sounding natural, without being too harsh or overbearing.
While more advanced compression plugins are available, Audacity has a built-in compressor that is decent for dialogue work, such as audio for podcasts or YouTube videos.
You can access it by selecting the audio you want to compress, then going to Effect -> Compressor.
Here, you’ll be given a wide variety of settings you can fine-tune. While the ideal settings will depend on your recording and your recording environment, here are the defaults I typically use for voiceover / podcasting / web content:
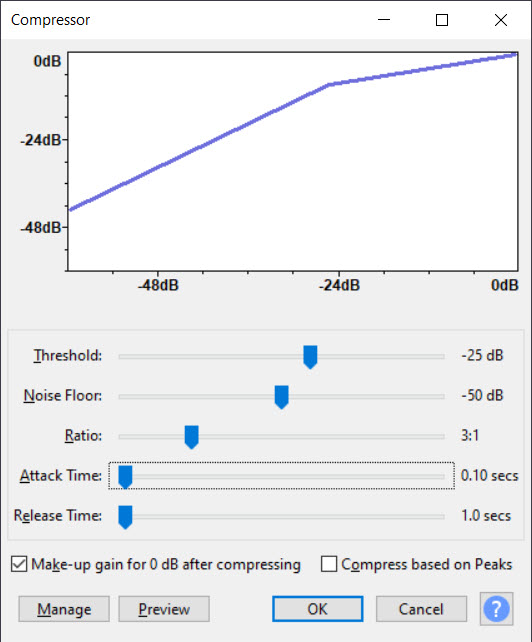
Threshold: -25 dB
Noise Floor: -50 dB
Ratio: 3:1
Attack Time: 0.1 seconds (this activates the compressor more quickly, which is important with dialogue)
Release Time: 1.0 seconds
Like everything else, feel free to play around with this to find the settings that are ideal for your specific recording.
5. Apply EQ
Equalization is an art in of itself, and there are no one-size-fits-all settings.
Every voice will need to apply EQ differently, and even things like the microphone you use and the environment your record in can affect it as well.
If you are unfamiliar with EQ or equalization, it essentially allows you to boost or cut various frequencies in your audio.
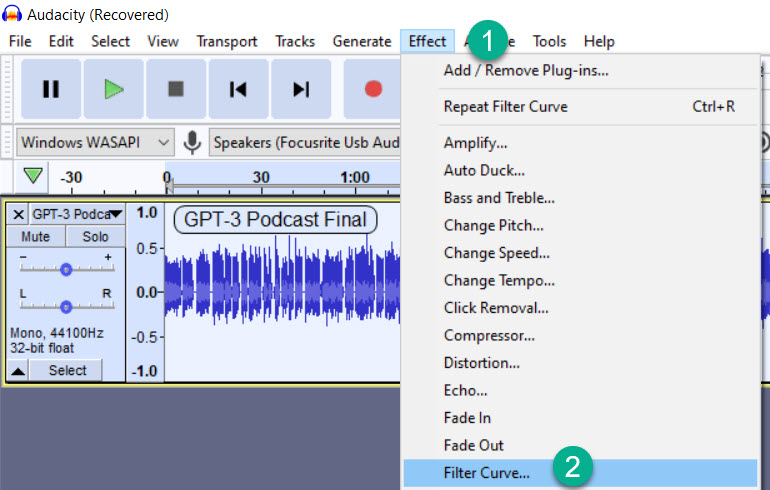
To access Audacity’s built in equalizer, go to Effect -> Filter Curve
You’ll be presented with an equalizer, which you can alter by clicking and dragging.
For a male voice, settings similar to the following should be good for many people (though there is no such thing as a perfect solution, as everyone’s voice is different):
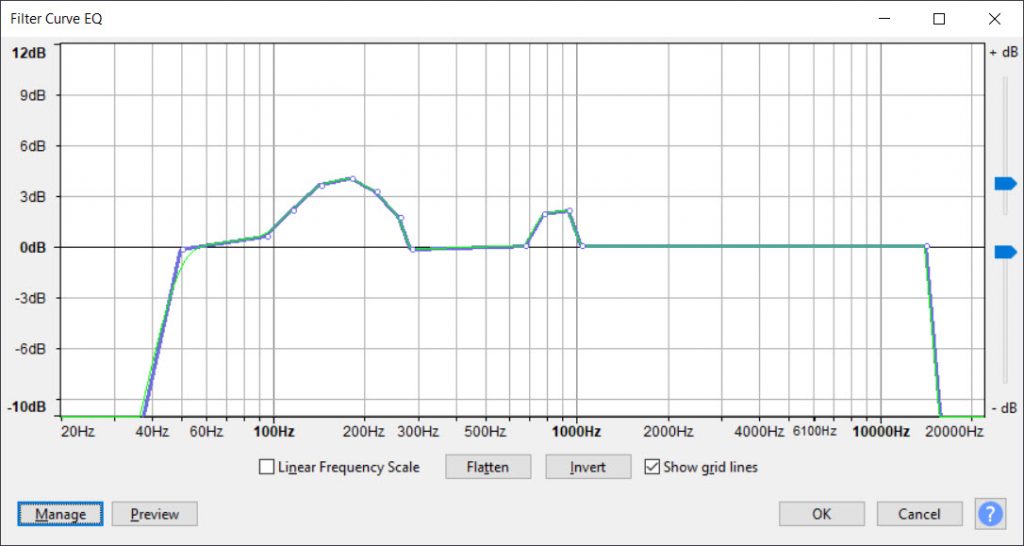
There are a few things to take note of here:
1. The bottom and upper frequencies are cut drastically as the human voice does not fall into these frequencies. This will cut out low rumbles and other natural ambiences of your recording environment.
2. Small boosts are given but aren’t drastic – no more than 4 or so decibels.
Start with something similar to this and adjust as necessary. The best way to understand EQ is to play around with it!
Once you have your settings dialed in, you should save it as a preset by clicking the ‘Manage’ button. This will prevent you from having to create the EQ curve again with your next recording.
Note that Audacity supports the use of third-party plugins. The default EQ effect that comes with Audacity is quite bare-bones and difficult to use, relative to other plugins available.
If you’re willing to invest the money, something like iZotope’s Neutron 3 or FabFilter’s Pro-Q 3 are perhaps the best EQ plugins on the market.
Conclusion
As you can see, there are quite a few things you can do to improve your audio quality while working with Audacity.
While this may seem like a large number of steps, it is really quite quick once you do it a few times, especially if you save your settings as presets.
The difference really is night and day, and can do to more for your audio quality than even a more expensive microphone would.
I hope that you’ve found this article helpful. If there are any questions that I can answer for you, please let me know using the comment form below.
Thank you!
– James McAllister

First, thanks for this. It's probably all the workflow most of us will ever need nicely explained. One question if I may…
I wondering about the ordering in the workflow of normalization and compression. Why this order? Why not compression first to even out the highs and lows and then normalization to get it to the level you want?
Not suggesting that the opposite order is better, just curious.
doug(Quote)
Hey Doug, that’s an excellent question!
The difference either way is likely to not be that significant. The reason I normalize first has to do with the dynamic range and the noise floor. Since normalizing takes the loudest peak up to whatever you normalize to, if you were to compress first (lowering the peaks and the dynamic range of the audio), it would bring the entire recording up more decibels.
This can lead to more issues with background noise peaking through since everything – including background noise is being brought up in volume. That being said, the audio is quieter this way so some people normalize a second time after compressing.
Hope this makes sense! Like I said, no problem trying each order out and seeing what sounds better for your specific recording.
James McAllister(Quote)