Are you looking to see a complete list of the reviews you’ve left on Google – and perhaps make changes to them?
Google Reviews are an incredible tool to help others make decisions about how they spend their time and money. And thankfully, if your experience with a place or a business has changed, you are able to update your review to reflect that.
So, how do you view, edit or manage the Google reviews that you’ve left?
In this article, I’ll be showing you how to do it step-by-step, first on desktop, and then on mobile. I’ll also show you what to do if a specific review you’re looking for is missing, and why it may have disappeared.
Let’s get started!
How To View And Manage Your Google Reviews On Desktop
First, let’s look over how you can view and manage your Google reviews on a computer.
If you have a lot of reviews you want to edit, doing it on a computer is a bit faster – not only is it generally easier to type more quickly, but the layout is a little nicer on desktop as well.
Note that this process is exactly the same regardless of your computer’s OS – be it Windows, Mac, Linux, or ChromeOS.
1. Visit Maps.Google.Com
First things first, it’s important to understand that your reviews are managed through Google Maps.
This means that you will need to start by going to the Google Maps website, which you can access by clicking here.
Alternatively, you can type into your browser, as it’s quite simple to remember – maps.google.com. Google.com/maps will take you there as well!
2. Click On The Menu Icon
![]()
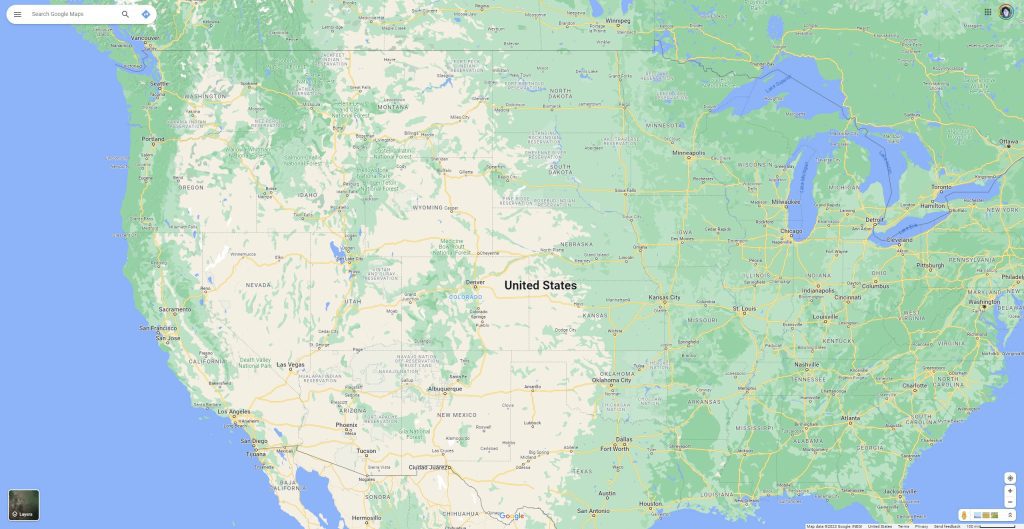
Once Google maps has loaded, there should be a search bar towards the top-left corner of your screen.
On the left-hand side of the search bar, click on the icon with three horizontal lines.
This is sometimes referred to as the ‘hamburger icon’, due to its resemblance to a hamburger.
Click on it, and it will open a new menu!
3. Click ‘Your Contributions’
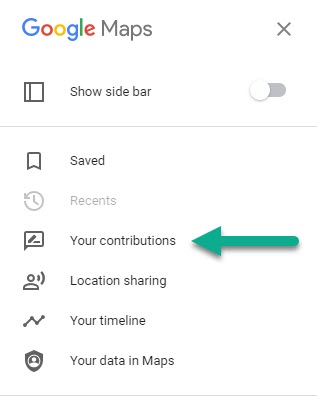
On the new menu that’s popped up, you will be presented with several options.
While it may be a good idea to review your data or your saved locations later, the option you’re looking for at the moment is labeled ‘Your contributions.’
Click on it, and it will open up yet another new menu.
4. Click On The ‘Reviews’ Tab
Here, you’ll be able to see all of your contributions that you’ve made to Google Maps.
However, they will be separated out to different tabs – one for reviews that you’ve left, one for photos of locations that you’ve added, and another for edits.
In order to view all of the reviews you’ve left on Google however, you’ll want to click on the reviews tab.
5. Locate The Review You Wish To Manage, Then Click The Icon With Three Dots
If you simply wanted to view all of the reviews that you’ve left, congratulations! At this point, you’ll be able to see a complete list of each and every review that you’ve left on Google.
These will be sorted based on when the review was left, so keep that in mind as you browse through them.
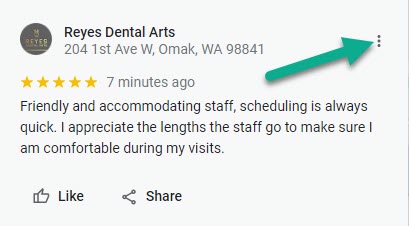
If you want to manage a specific review however, scroll through the list of reviews until you find the one that you want to manage.
Then, click on the icon with three vertical dots towards the top-right corner of the review.
6. Edit Or Delete The Review
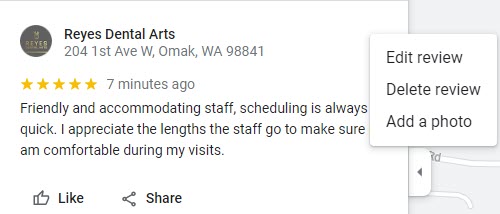
Once you’ve clicked the icon with three vertical dots, you’ll be presented with three options.
The first allows you to edit the review – either changing the text, or the number of stars. If your experience with a location has changed, it may be a good idea to edit your review to reflect your updated experience there.
Secondly, you can also delete the review entirely, if you no longer want it to be published.
Finally, you can add a photo to accompany your review by clicking on the ‘Add a photo’ button.
Unfortunately, there does not seem to be a way to delete reviews en masse, so you will need to repeat the process for each review that you want to remove.
How To View And Manage Your Google Reviews On Mobile
Now that we’ve looked over how to view all of your Google reviews on desktop – as well as manage them, let’s now look over how it can be done on mobile.
Thankfully the process is pretty straightforward on mobile as well. So, once you know where to look, managing your Google reviews is quite easy!
1. Download / Open The Google Maps App
The easiest way to manage your Google reviews – or view all of them at once, is to do it through the Google Maps app.
Google Maps comes pre-installed on most Android phones, but will need to be downloaded from the App Store if you’re using an iPhone or iPad.
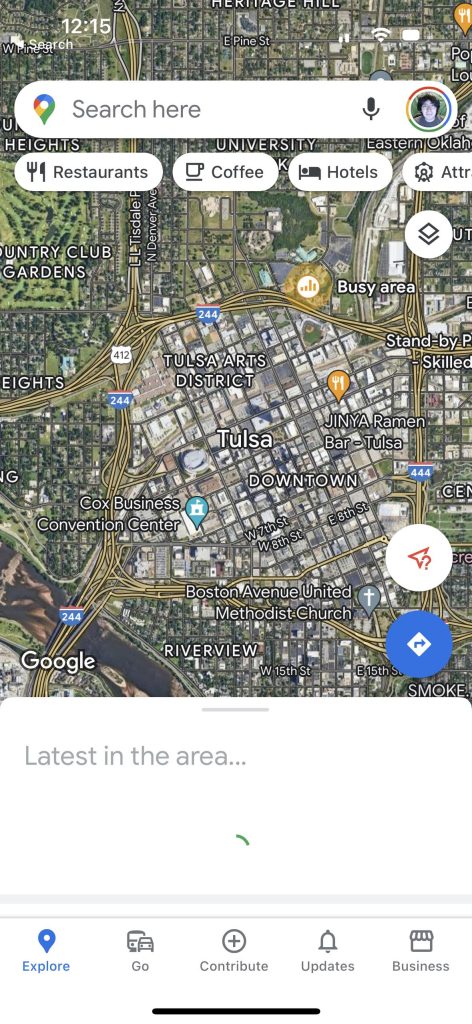
Thankfully, the app is free. So, download it and open it up to see a picture similar to the one above.
Note: You will need to sign into your Google account within the app, if you aren’t signed in already.
2. Tap On Your Profile Picture
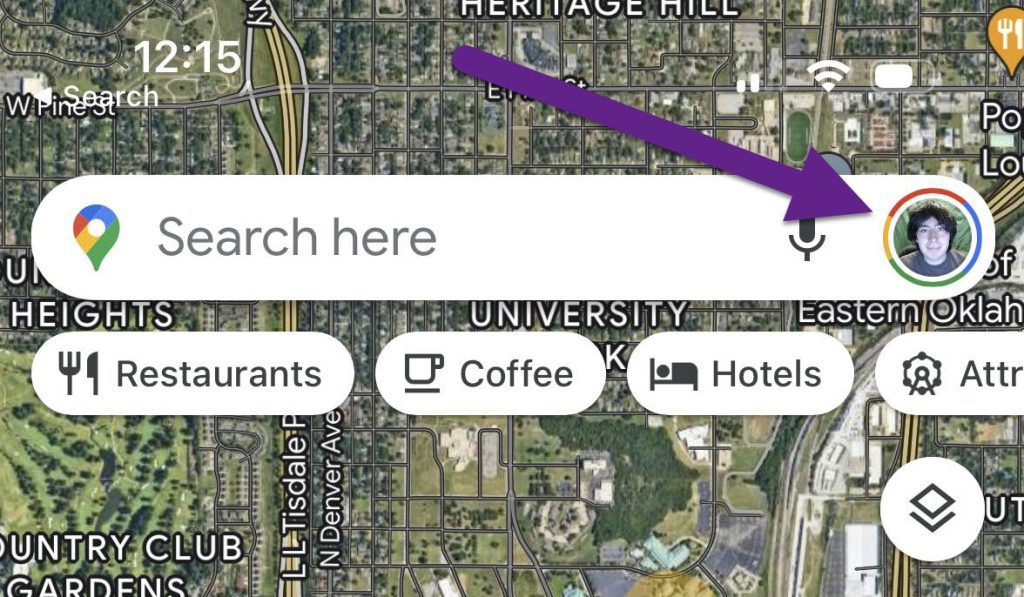
Next, tap on the profile picture for your Google account.
This will be located on the right-hand side of the search bar, towards the top of the screen.
If you haven’t uploaded a profile picture, it may just show a letter there, with a solid color background.
Anyhow, once you tap on it, it should open a new menu.
3. Tap On ‘Your Profile’
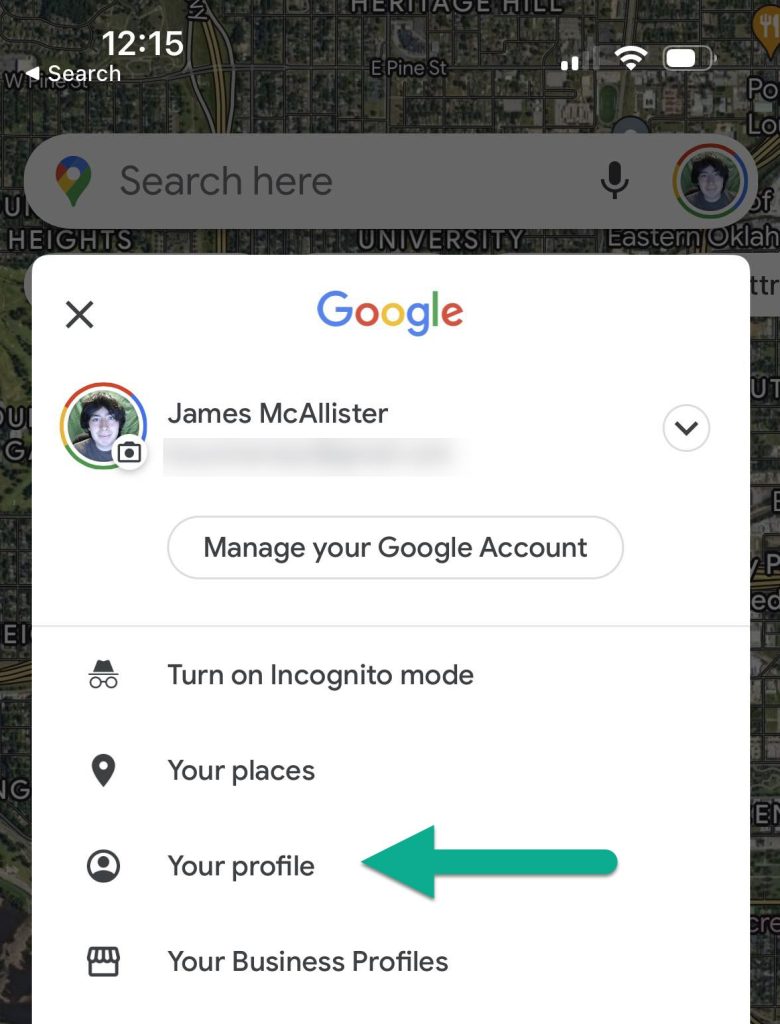
On the new menu that pops up, you’ll be presented with a lot of options!
To make matters more confusing, these options are different than what you’d find in the desktop instructions mentioned earlier.
Anyhow, the section you’re looking for at the moment can be accessed from your Google Maps profile.
So, tap on ‘Your profile’, and proceed to the next step.
4. Under The ‘Reviews’ Section, Tap On ‘See All Reviews’
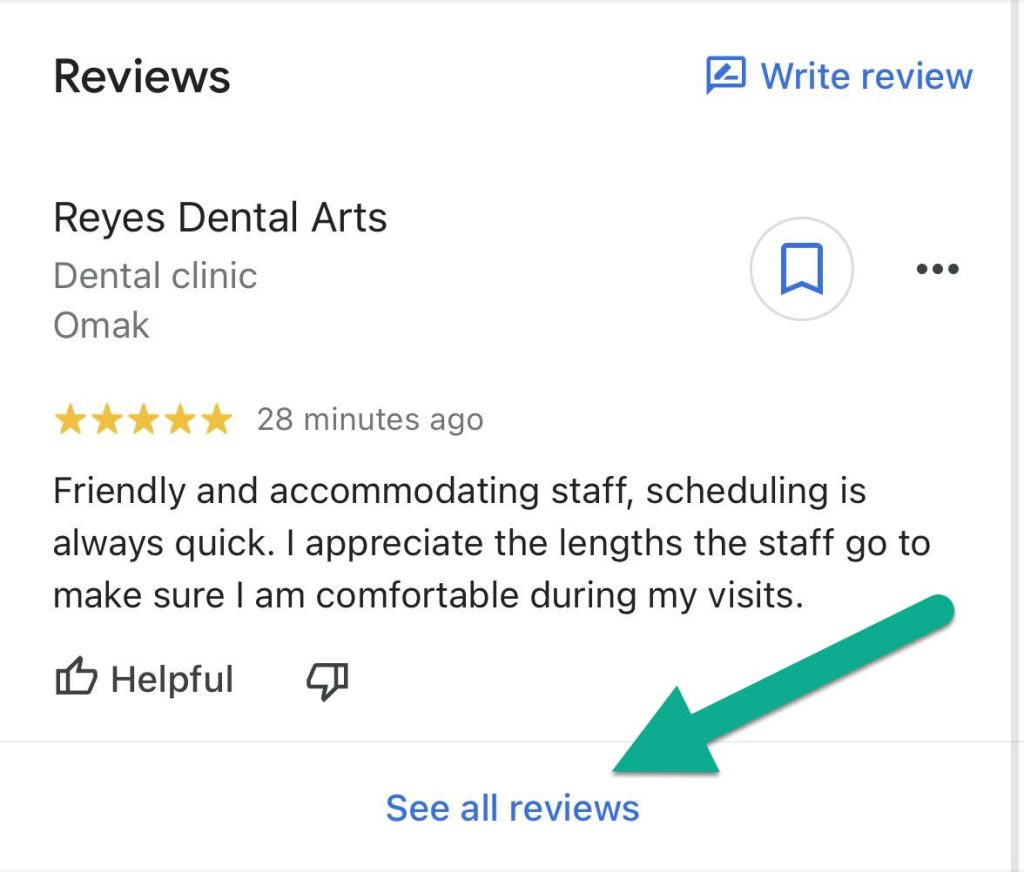
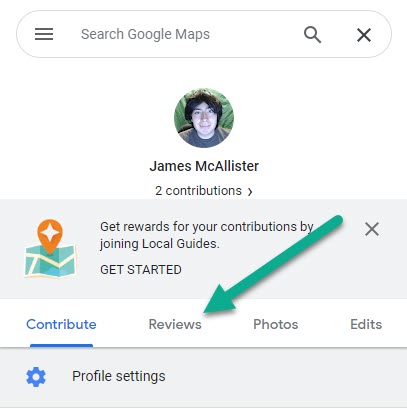
On your profile, you will be able to see some of the contributions that you’ve made to Google Maps.
First, any pictures you’ve uploaded will be displayed at the top.
If you scroll down however, you’ll reach the ‘Reviews’ section.
To view all Google reviews you’ve left, tap on the button that says ‘See all reviews.’
5. Locate The Review You Wish To Manage, Then Tap The Icon With Three Dots
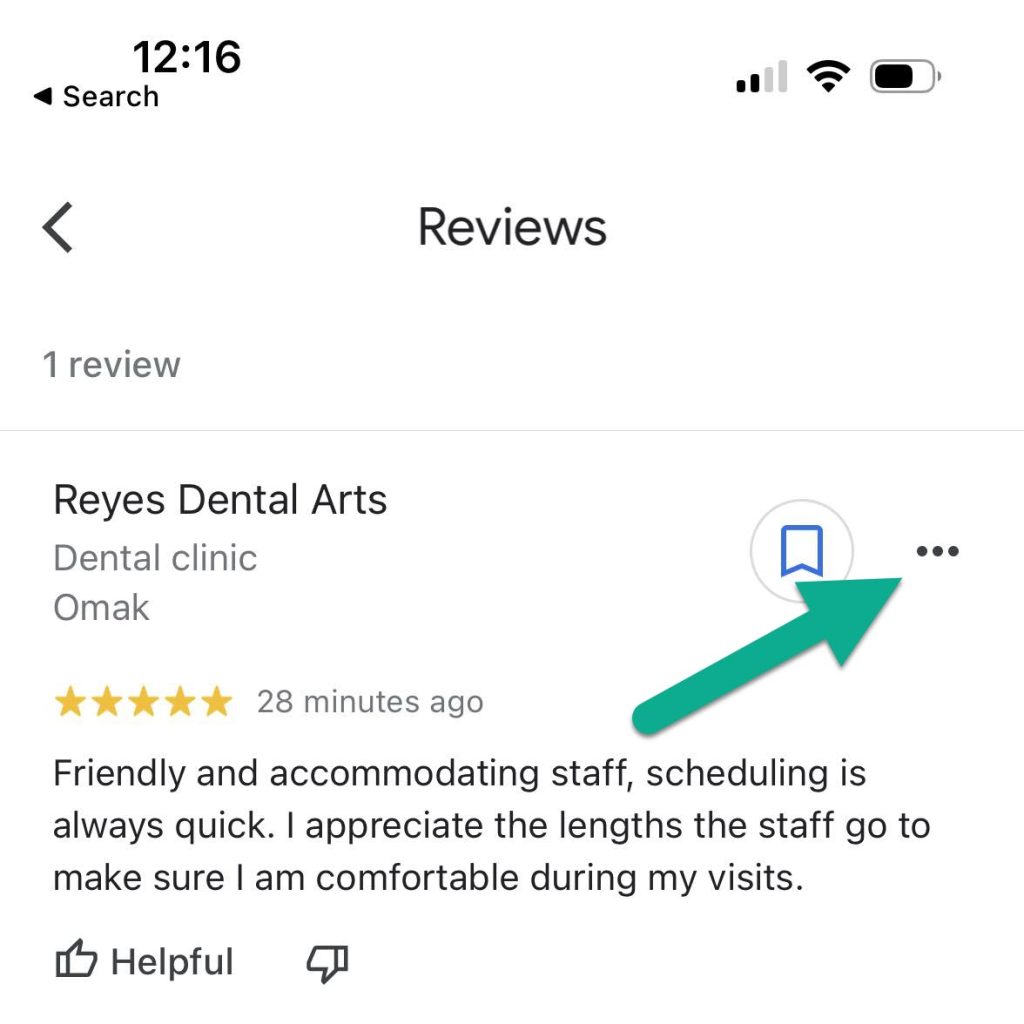
Here, you’ll find all reviews that you’ve left on Google!
If you simply want to view them, you can stop here. The reviews will be sorted by the order in which you posted them, so feel free to scroll through them at your leisure.
If you want to make changes to a review however – such as editing it, deleting it, or attaching a picture, there are a few extra steps.
To start, locate the review you want to change, and tap on the icon with three horizontal dots in the top-right corner of that review.
6. Share, Edit, Or Delete The Review 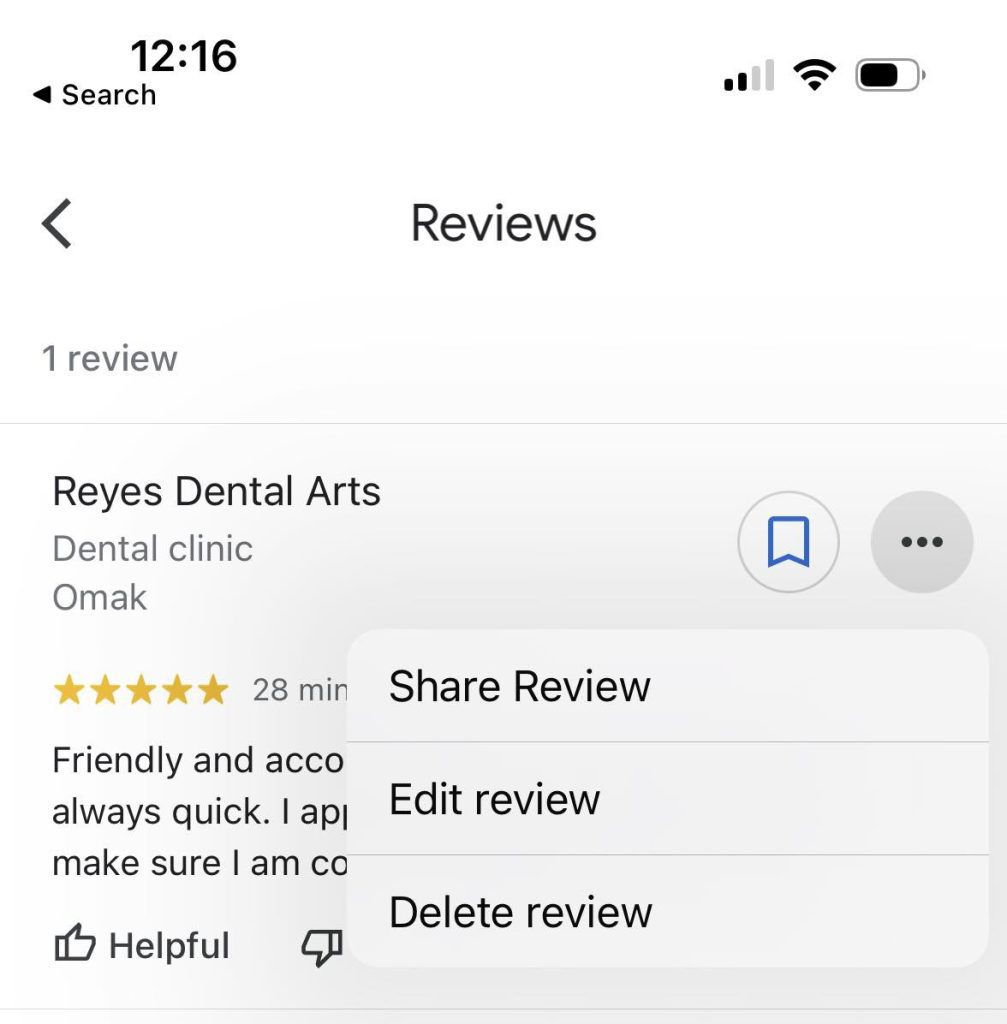
After you’ve tapped on the icon with three dots, it will pull up three additional options.
The first is to share the review with others – eithe rallowing you to share it to specific contacts on your phone, or post it to social media.
The second option is to edit the review. Here is where you can make changes both to the number of stars, as well as the text content of your review.
Finally, you can delete the review entirely should you wish to do so.
You may have noticed that the ‘Add a photo’ button is missing, which was present in the desktop section. Thankfully, you can still add a photo to your review from here – the option will be available when you select ‘Edit review.’
That’s all there is to it! Now that you’re on the page with all of your Google reviews, you can manage them as necessary by following the instructions above.
Is There A Quicker Way To Edit Just One Review?
Since there is quite a few steps involved with seeing all Google reviews that you’ve posted, you may be wondering – is there a quicker way if you just want to edit a single review?
It turns out, there is!
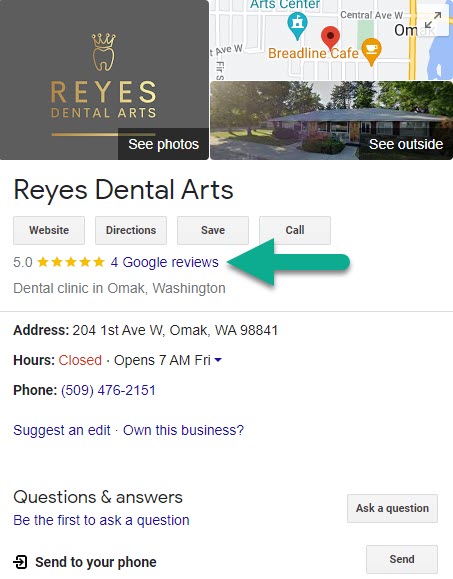
If you Google the location you’ve left a review for, you should see a widget on the right-hand side that looks similar to the one pictured above.
From there, click on the number of reviews to open up all the reviews for that location.
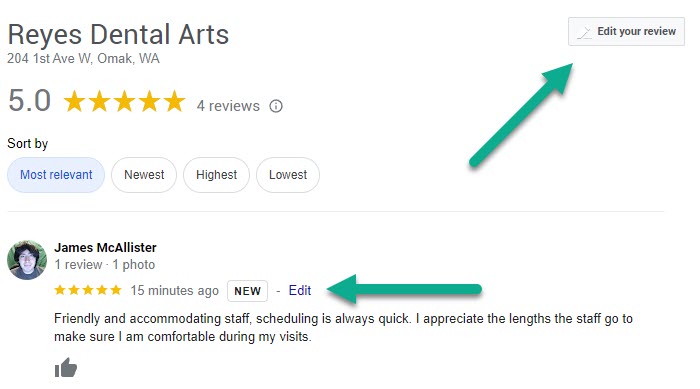
From there, you’ll find a button in the top-right corner that says ‘Edit your review’ if you’ve left one for that location.
You can also scroll down until you find your specific review, and then click the ‘Edit’ button right above it.
So, if you only wish to edit or manage a single review, this may be a quicker way to go about it!
My Google Review Isn’t There! Why?
Let’s say that you go to edit a specific review that you’re sure you’ve left, but it’s no where to be found. What could have caused this to happen?
First of all, it’s important to know that businesses are unable to delete reviews themselves, so you shouldn’t hold this against the business or location. Instead, your review was likely removed because it violated Google’s review guidelines.
Some possible reasons your review may have been removed include:
- It included obscene or vulgar language.
- The business suddenly received a lot of reviews at once, leading Google to believe that they were manipulating their reviews.
- The review promoted a competitor.
- The review contained a link.
- Google has mistakenly believed that your profile is fake / spam.
- The review was fraudulent or deceptive.
- You’ve left several reviews for the same location across multiple profiles.
- The review was attacking a specific individual.
- It was never actually posted due to a technical glitch.
A full list of Google’s review guidelines can be found here.
Unfortunately, it isn’t usually possible to figure out why a review is no longer there.
However, you’re welcome to try leaving another review for that location should you wish to do so!
Conclusion
Once you know where to look, it’s fairly simple to find all of the Google reviews that you’ve posted.
From there, you can manage them as you wish – such as updating reviews to reflect new experiences, adding photos to your reviews, or deleting them entirely.
I hope that you’ve found this article helpful, and you’ve managed to locate all the reviews that you’ve posted.
If you are running into any issues or there are any other questions I can answer for you, let me know via the comment form below and I’ll be happy to help.
Wishing you the best,
– James McAllister

I’ve always wondered how to view and manage my Google reviews, and your step-by-step guide on both desktop and mobile is just what I needed. It’s awesome that we can update our reviews to reflect any changes in our experiences, and even add photos to make them more informative. 📸
I must say, your instructions are crystal clear and easy to follow. 👍 The screenshots are a nice touch too, they really help visualize the process. It’s good to know that I can access my reviews on any computer OS or through the Google Maps app on my phone. 🗺️
Tekkaus(Quote)
And thanks for sharing the tip about Googling the location to quickly edit a review! That’ll save me some time if I only want to make a change to a specific review. ⏰
Oh, and I appreciate you addressing the issue of missing reviews. It’s good to know that there are guidelines in place to ensure the integrity of the reviews, even though it can be frustrating if one of our reviews gets removed. 🚫 But hey, at least we can always leave another review if we want to!
Tekkaus(Quote)