Are you looking to delete photos from Google Photos or Google Drive, but you don’t want them to be deleted from your iPhone?
Although Google Photos is a great way to backup and sync your photos across devices, it’s completely understandable if you want to keep a copy on your phone.
So, how do you delete photos from Google Photos without also deleting them from your iPhone at the same time?
In this article, I’ll share several different strategies!
How To Delete Google Photos, Without Removing Them From Your iPhone
Currently, there are several different ways to ensure that you’ll still keep your photos on your phone, even if you end up deleting them from Google Photos.
I’ll go over several different strategies, so you can consider which one will be right for you. I’ll also share what to do if you end up deleting a photo or video by mistake, to ensure it’s not lost forever!
1. Delete Them On Your Computer
The easiest way to manage your Google Photos collection is to visit Google Photos on your computer, at Photos.Google.Com.
By using the desktop version of the site, it’s far easier to navigate through large photo albums, and delete large amounts of photos at once. And since you’ll be doing it on your computer, there’s less risk that the changes will sync to your phone, and delete the photos there as well.
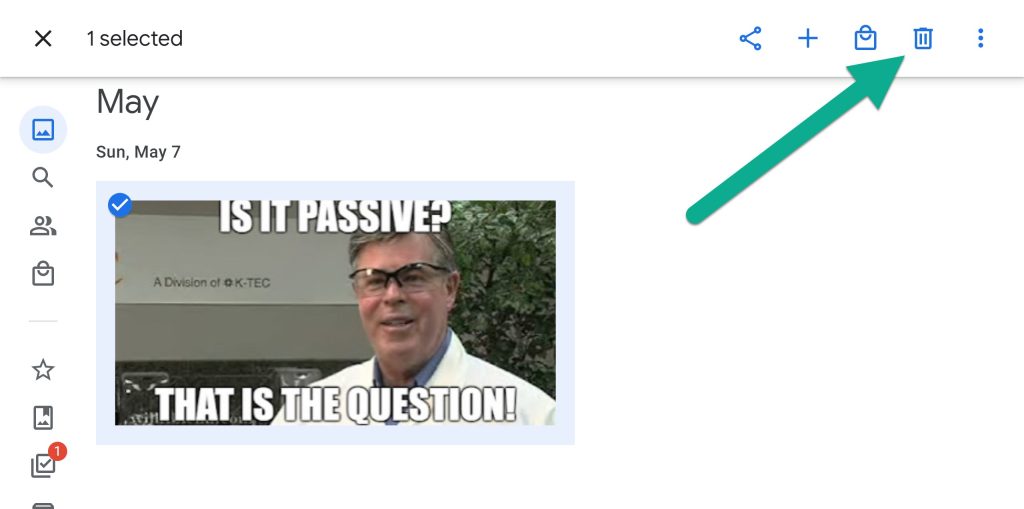
To delete the photos, all you have to do is select the ones that you want to delete, then click on the trash can icon in the top-right corner.
Note that if you have backup sync enabled for Google Photos and the photo is still on your phone, it will automatically reupload to Google Photos the next time you open the app.
So, you may wish to disable backup sync by following these steps:
- Open the Google Photos app on your iPhone.
- Tap on your profile picture in the top-right corner.
- Make sure that backup is turned off.
Once it’s off, you should be able to delete photos freely without them resyncing!
2. Delete Them Through The Google Photos App
Before doing this, you’ll want to make sure that you have a copy of the photo saved in your actual ‘Photos’ app. Not just Google Photos, but the normal Photos app that comes with your phone.
The photos should be saved in the default camera roll folder, and not through any folders that may have been temporary created by the Google Photos app.
Once you’ve verified that they’re there, you can safely delete the photos through the Google Photos app on your phone.
The local copy you have saved in your Photos app will still remain, and won’t be deleted. However, any other devices that can only access the photo through Google Photos will no longer have access to it, since it’s no longer being stored in the cloud.
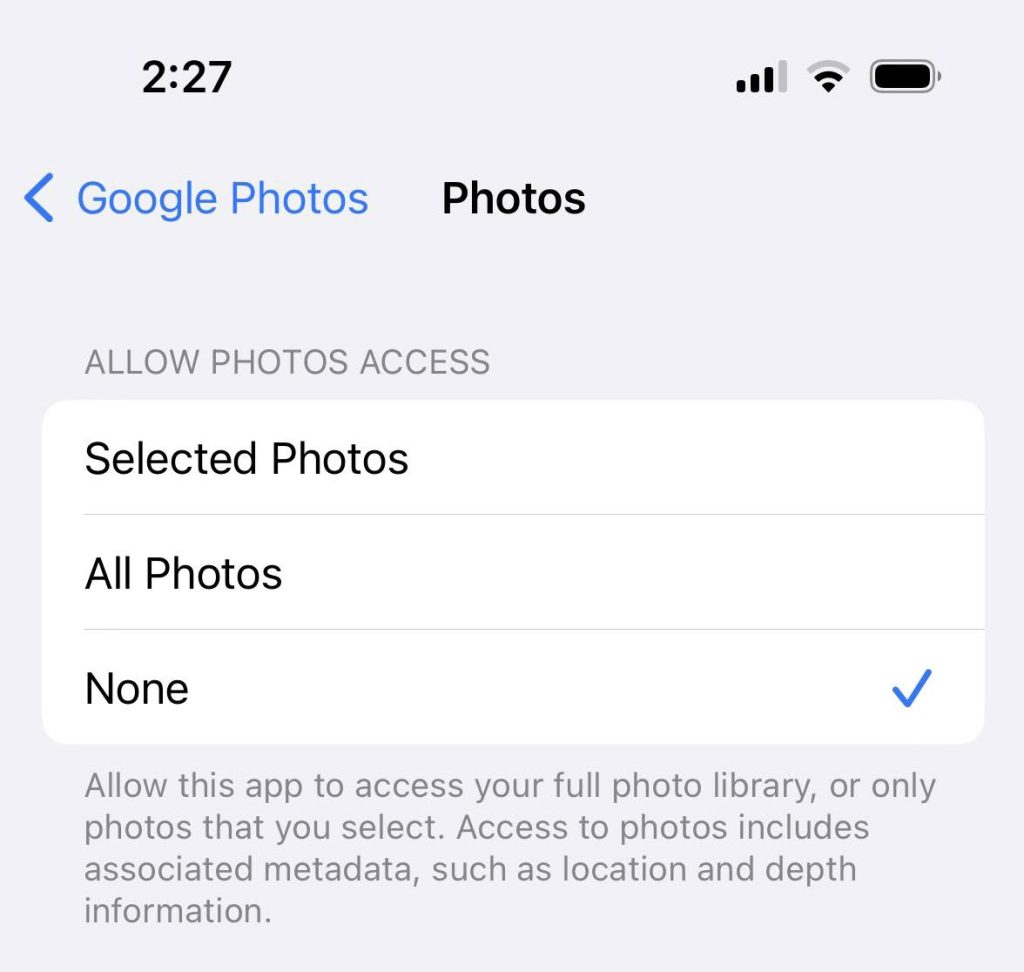
If you want to be extra safe, you can deny Google access to your phone’s storage by following these steps:
- Open the ‘Settings’ app.
- Scroll down, and tap on ‘Google Photos.’
- Tap on ‘Photos.’
- Change it from ‘Selected Photos’ or ‘All Photos’ to ‘None.’
- Return to the Google Photos app.
This will ensure that Google no longer has any access to the photos on your device, so it will be unable to make any changes to them.
However, you won’t be able to upload new photos from your iPhone to Google Photos without turning this setting back on later.
As mentioned earlier, disabling backup sync may also be a good idea. You can do this by following these steps:
- Open the Google Photos app on your iPhone.
- Tap on your Google profile picture in the top-right corner.
- Make sure that the backup feature is disabled.
3. Download A Copy First

Finally, if you want to be completely sure that your photos will be safe, you should always make sure you have a local copy available.
The easiest way to do this is to manually download the photos or videos that you wish to keep. This can be done on any device, including your iPhone, Mac, or PC.
On desktop, all you have to do is open the photo, and click on the icon with three vertical dots in the top-right corner.
Then on the new window that pops up, click ‘Download.’ You can also use the shortcut Shift+D to save time if you are downloading a lot of photos.
Again, once you verify you have a local copy, you have nothing to worry about – you can safely delete the photos from Google Photos, and will always be able to restore it if it’s lost! Even if you download it to your computer, transferring photos to your iPhone is a relatively simple process.
What To Do If Photos Are Accidentally Deleted
Let’s say that for whatever reason, you delete a photo from Google Photos, and it’s now missing from your iPhone as well.
Don’t panic!
Fortunately, deleted photos are not truly deleted – at least not yet.
Google keeps them in a separate ‘Trash’ folder for 60 days. This means that you have 60 days to restore the photos, before they are deleted forever.
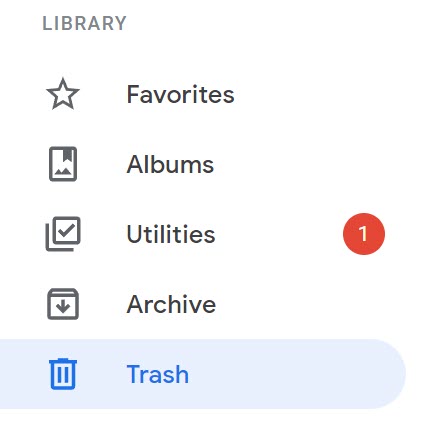
On desktop, you can access the trash folder by clicking the ‘Trash’ button in the left-hand navigation menu.
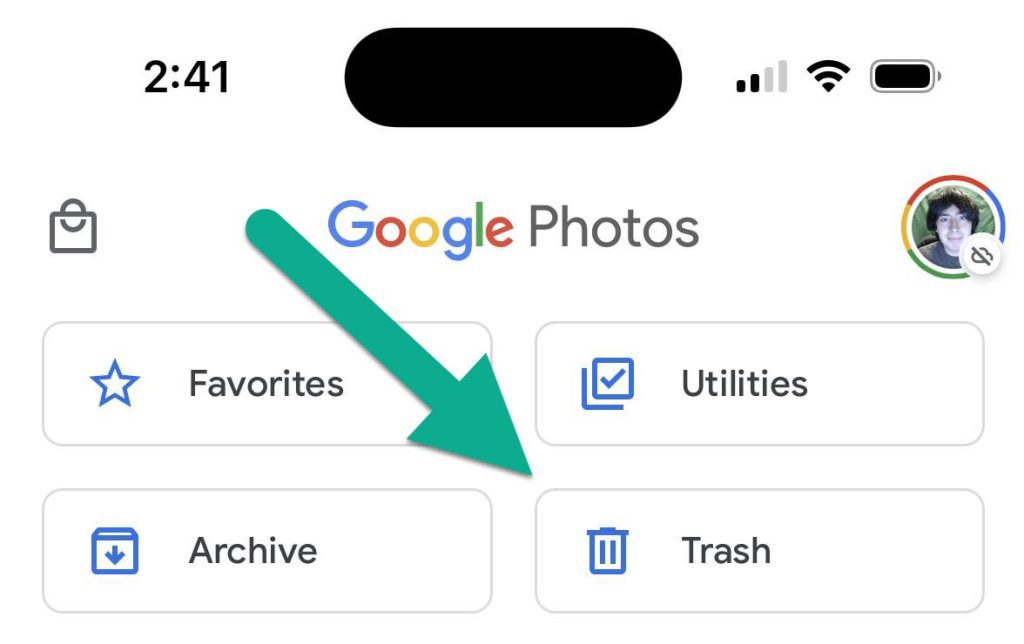
On your iPhone, the trash can also be accessed by clicking on the ‘Library’ button in the bottom-hand navigation menu.
Then, clicking on the ‘Trash’ button towards the top of the screen.
Once you’re inside the trash folder, photos can be safely restored as if they were never deleted.
So, you may wish to quickly glance through your trash once you’re done to make sure there’s nothing you deleted by mistake!
Conclusion
Although Google Photos is a great way to backup and sync your photos across multiple devices, you’ve got to be careful when deleting them.
As long as you have a local copy stored on your iPhone, you should be able to safely delete them from Google Photos. Although they will no longer be available in the Google Photos app, they will remain on your iPhone for you to view and enjoy.
I hope that you’ve found this article helpful. If you have any other questions about Google Photos or there’s anything I can explain better, let me know via the comment form below. I’ll get back to you as soon as I can.
Wishing you the best,
– James McAllister
