Are you sick of seeing Marketplace listings from sellers that are too far away from you?
This can be annoying, especially if you know there’s no way you’d ever be able to purchase those items.
Thankfully, Facebook allows you to restrict the listings to just your local area, and turning this setting on is actually quite simple!
So, in this article I’ll be showing you step-by-step how you can set Facebook Marketplace to local only, and even set it so you only see listings within a certain number of miles from your house.
Let’s get started!
How To Change Facebook Marketplace To Local Only On Desktop
To start, let’s look over how you can change Facebook Marketplace to only show local listings through your desktop or computer.
Step One: Open Facebook Marketplace
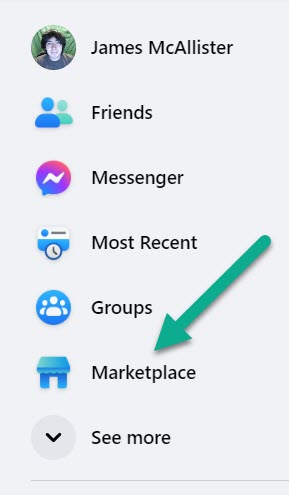
To start out, you’ll need to navigate to Facebook Marketplace.
The button for this can usually be found on the left-hand side of your screen, from the main Facebook page.
If you don’t see it, click on the ‘See more’ button to show more options.
Step Two: Click On The Text Below ‘Filters’

Once you open Facebook Marketplace, you should see a menu on the left-hand side, running down the screen.
Past the initial buttons, you should see a section called ‘Filters’, with some blue text underneath.
Click on that blue text to open up a new page, which will let you specify the location you want to see listings for.
Step Three: Change The Location And Radius
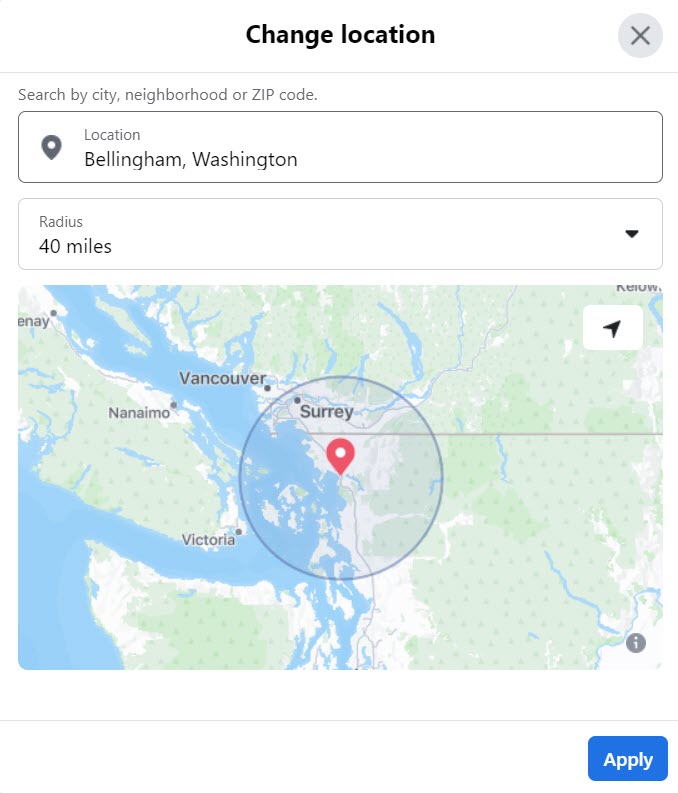
Finally, your last step is to change the location and radius using the box pictured.
It’s recommended to change your location to the city you’re currently in. While the mobile app allows you to drag the location down to your specific house if you want, the desktop version of Marketplace only allows you to select a city or zip code.
After you’ve got it as close to you as possible, change the radius to whatever distance you’re comfortable with.
Facebook allows you to narrow down to as close as 1 mile, to as far as 500 miles. So, you really have a lot of control here!
This will restrict listings to only show within X miles of the location, regardless of the direction.
Once you’ve chosen your new settings, hit the blue Apply button in the bottom-right corner! Your Marketplace page should immediately refresh, and show new listings to reflect your new settings.
And there you go – your Facebook Marketplace will now only show local listings!
How To Change Facebook Marketplace To Local Only On The Facebook Mobile App
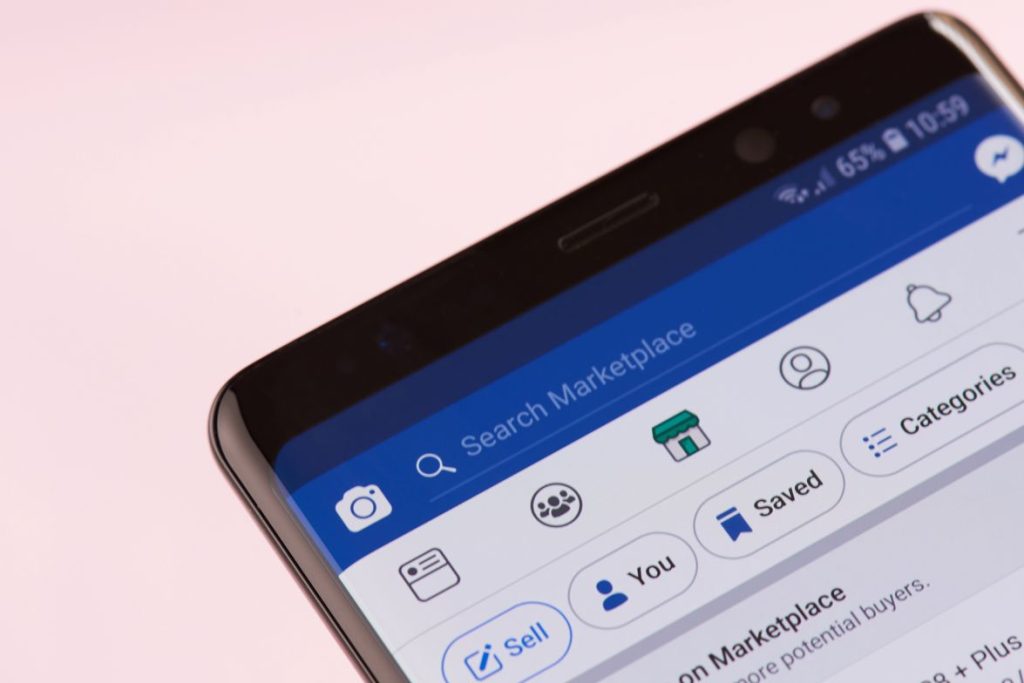
Next, let’s look over how to change your Facebook Marketplace location using the Facebook mobile app.
The process is almost exactly the same as on desktop, but the buttons and settings are located in slightly different places.
Thankfully, it’s just as quick!
Step One: Navigate To Facebook Marketplace
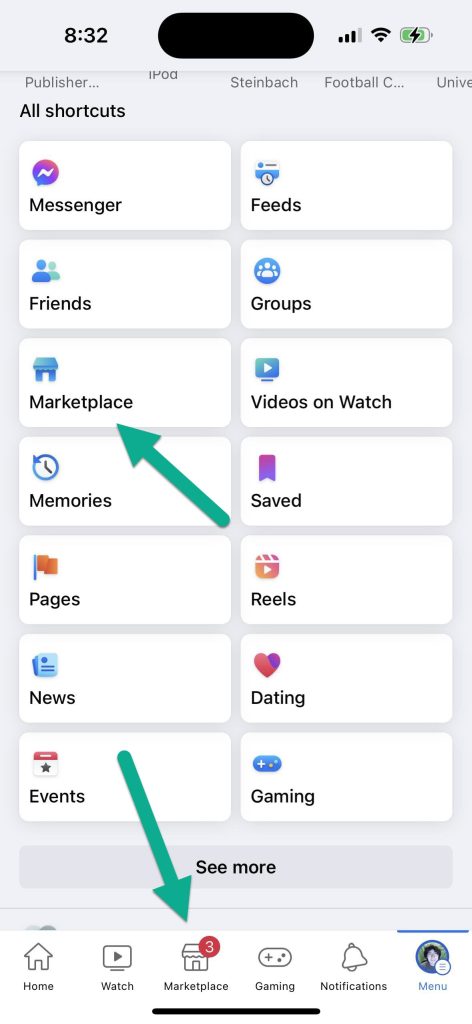
First things first, you will need to navigate to Facebook Marketplace.
Often times, there will be a button specifically for Marketplace that you can find on the navigation menu at the bottom of your screen.
If the button isn’t present however, you can also reach it by tapping on ‘Menu’ on the bottom navigation menu, and then tapping on ‘Marketplace’ from the list of shortcuts that pops up.
Once you’ve opened Facebook Marketplace, continue on to the next step.
Step Two: Tap On The Icon With A Person At The Top Of The Screen
![]()
Next, tap on the icon of a person towards the top-right corner of your screen.
This will be located between the icon of a shopping cart, and the icon of a magnifying glass.
Once you tap on it, it should pull up a menu with additional settings.
Step Three: Tap On ‘Location’
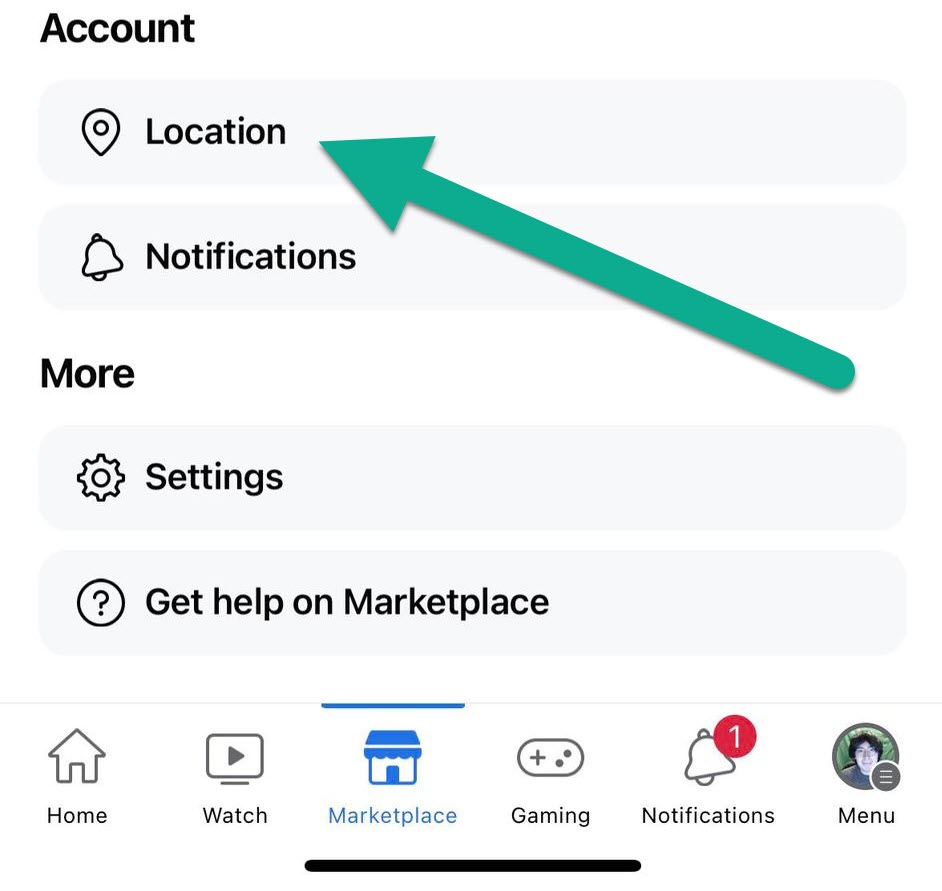
On the new menu, scroll down until you get to the ‘Account’ section.
Then, tap on the button that says ‘Location.’
This will bring up the final window, allowing us to move onto the final step!
Note that if you’d like, you can also adjust other Marketplace settings, such as your notifications through this section as well.
Step Four: Adjust Your Marketplace Location
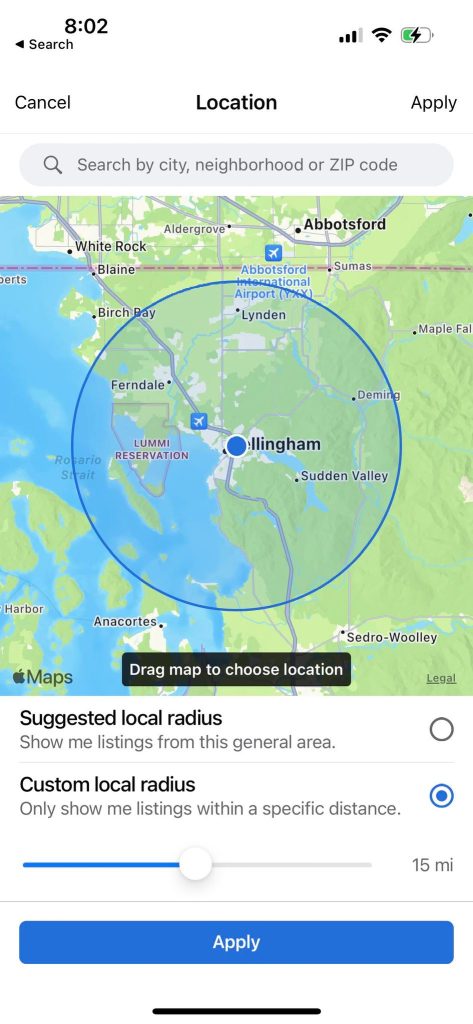
Finally, here you can adjust two things.
The first is where your location actually is. You can either type in a city, neighborhood or zip code, or you can manually drag the location marker wherever you’d like using your finger.
Then, you can choose a custom local radius, where you can specify how far away from you that you want to see listings for.
On mobile, you can set this as low as 1 mile, to as high as 250 miles. If you want to set it as high as 500 miles, you will need to do this on the computer.
Of course, 250 miles away is already plenty for most people!
Once you’ve chosen your new settings, simply hit the blue Apply button at the bottom of the screen, and you are done!
Conclusion
Once you know where to look, setting your Facebook Marketplace to only show local listings is simple.
Of course, if you ever change locations, you can always return to these settings to update it, so you’re still getting results that are nearby.
I hope that you’ve found this article helpful, and you’ve managed to get your settings updated.
If you have any other questions about Facebook Marketplace, ask them below and I’ll be happy to help!
Happy shopping,
– James McAllister

No more scrolling through items that are miles away from us, right? That can be such a pain! 😩 But thanks to your step-by-step guide, I now know exactly how to set it up on both desktop and mobile. 🖥️📱 You’ve made it so easy to follow with your clear instructions and screenshots. 📸
I love how you broke down the process for each platform, so whether we’re using our trusty computers or our handy smartphones, we can easily tailor our Marketplace experience to suit our local needs. 🌍📍 And the fact that we can even customize the radius to our liking is fantastic! 🌟 Whether we want to see items within a mile or up to 500 miles (if on desktop), Facebook has got us covered. 🌈
Tekkaus(Quote)