Are you looking to change the thumbnails that appear on your computer’s file browser?
Although Windows will auto-generate thumbnails for each video that appears within your File Explorer, these aren’t always optimal.
So, you may wish to change them to something that better reflects the contents of the video.
Thankfully, changing the thumbnail is easy, and only takes a few seconds once you know what to do.
In this article, we’ll go over step-by-step how to change the thumbnail of individual video files within Windows 10 and Windows 11.
1. Download And Extract Tag Editor For Windows
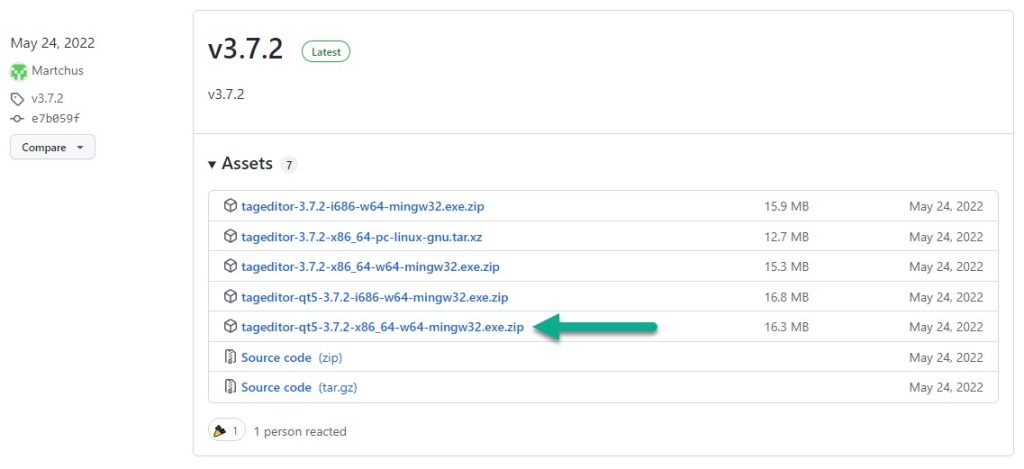
The first thing you’ll need to do is download a piece of software called Tag Editor, which you can view by clicking here.
Note that this software is still being actively developed, so the exact version number may not match the picture that you see above. However, you’ll want to download the most recent version, which should always be at the top of the page.
For most people, you’ll want to download the version most similar to the one pictured above. This version is for 64-bit systems running Windows, which is the majority of computers sold today.
The software is packaged in a .Zip file. This means that you’ll need to use unzipping software like 7-Zip or WinRAR to extract it. If you’ve opened a ZIP, 7Z or RAR file before, you should already have this software installed.
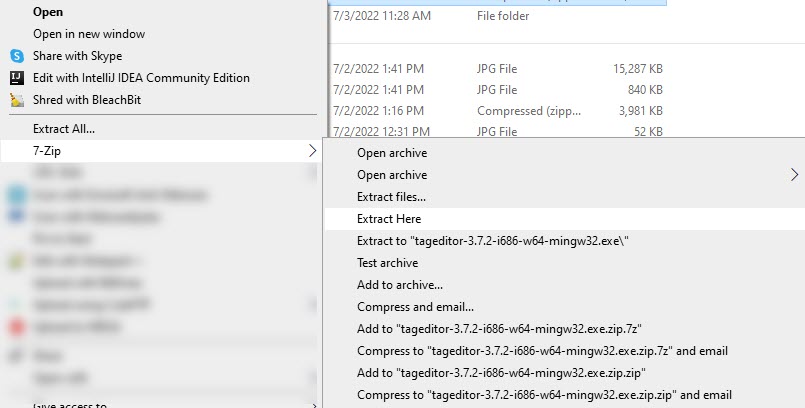
It can usually be used by right clicking on the downloaded ZIP file, and then clicking something like ‘Extract’ or ‘Extract Here.’
Extract the software, navigate to the folder it was extracted to, and run the application inside.
Further Reading: Is 7-Zip Safe?
2. Click On ‘File’, Then ‘Open’
Once you’ve got Tag Editor open, the rest of the process is pretty straight forward.
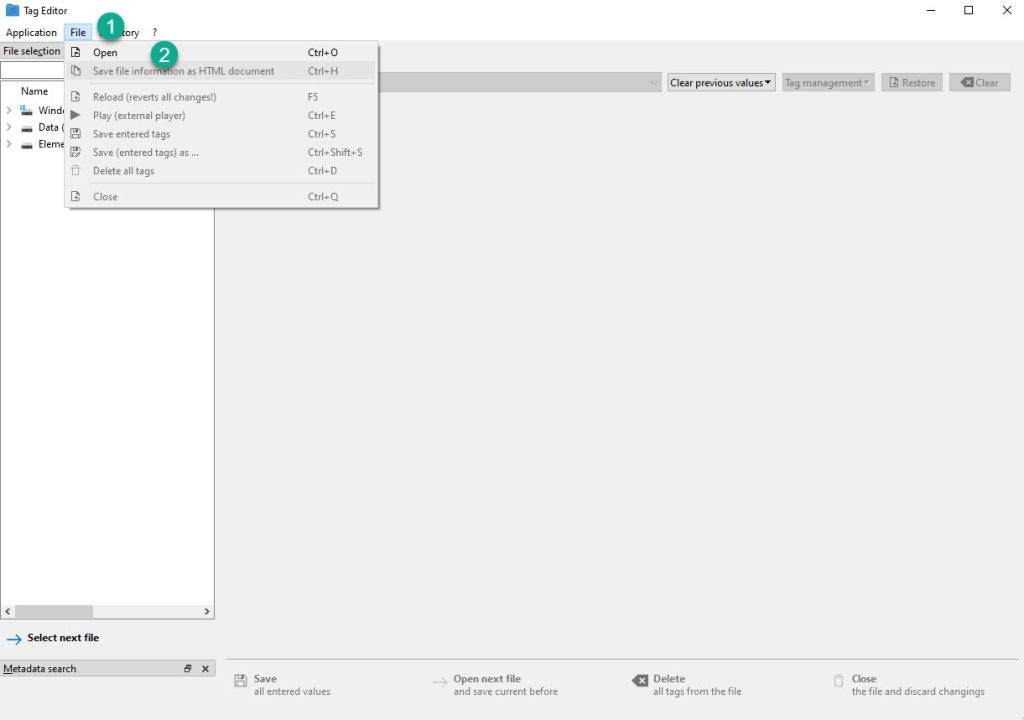
The first thing you’ll want to do is click the ‘File’ tab running across the top of the window.
Then, click on the ‘Open’ button directly underneath it.
This will allow you to select the video file that you want to edit.
Select the video that you want to change the thumbnail for, and open it.
3. Choose Your New Thumbnail
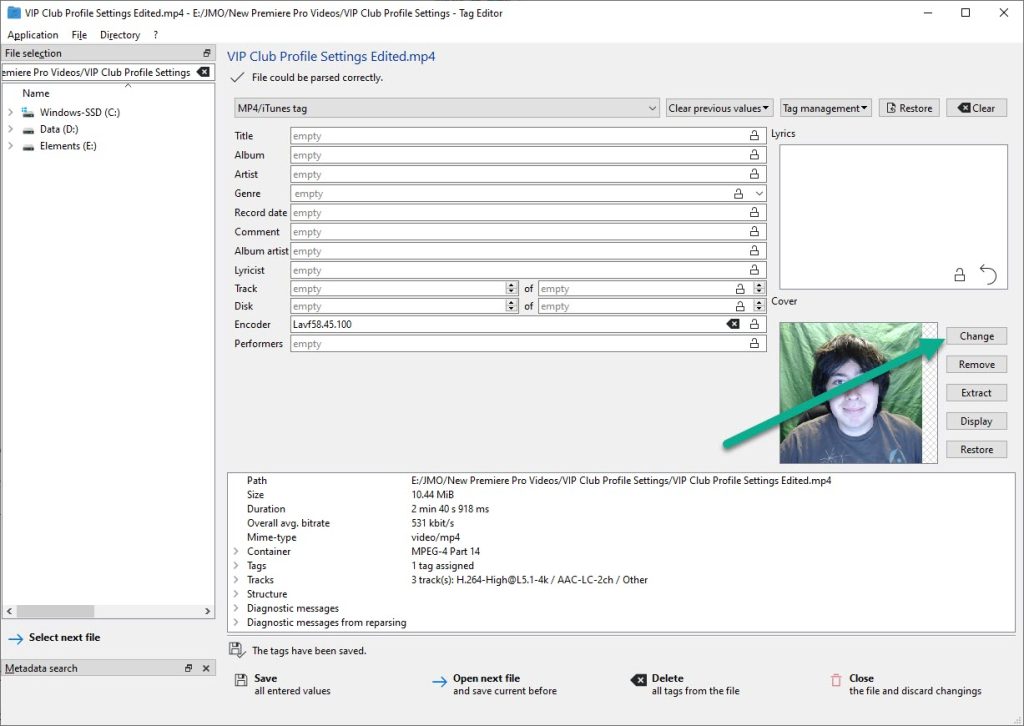
Once the video has been loaded into Tag Editor, click on the ‘Change’ button underneath the ‘Cover’ section.
This will open up another file browser, where you can choose the photo that you want to use for the thumbnail.
Note that you don’t have to use a screenshot from the video itself. You are free to use any photo on your computer.
In this example, I used an old photo of myself.
Then, all you need to do is click on the ‘Save’ button at the bottom of the screen. You can also save it by going to ‘File’ and then ‘Save entered tags.’
4. (Optional) Rename The Generated .Bak File
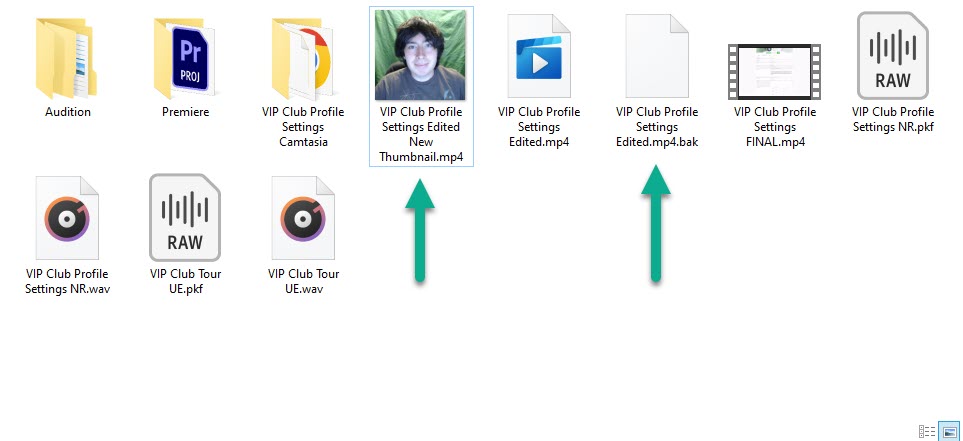
Above, you’ll see that the software generated another copy of the video, ending it with a .bak file.
This is because by default, the software does not overwrite your original files. Instead, it creates an extra backup of them, and makes all the changes to that new file.
This is so you don’t accidentally overwrite something by mistake, and are unable to recover it.
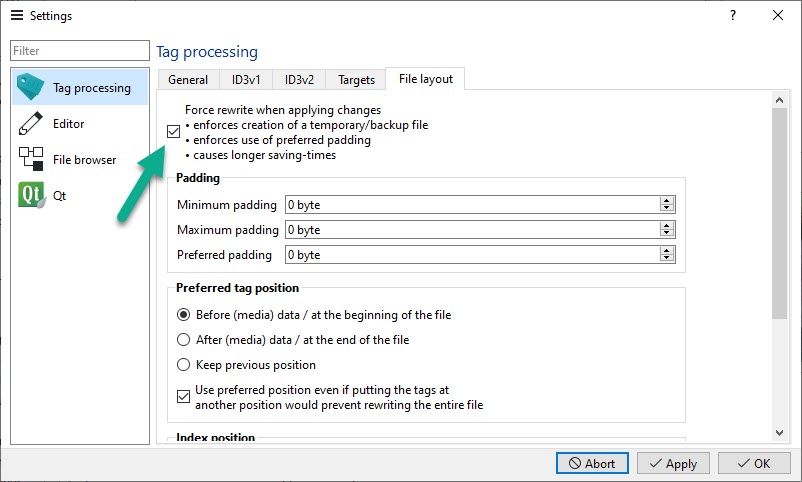
However, you can disable this setting and write changes to the original file by going to Application -> Settings -> Tag Processing and unchecking the ‘Force rewrite when applying changes’ box.
Anyhow, if you leave this setting turned on, it will create a .bak file.
Simply rename the file to remove the .bak, and your new video file – with the updated thumbnail will be there!
You can see this in the picture above – I have the original file (which doesn’t have a thumbnail), as well as the new file with the thumbnail that I just added.
Pretty neat!
What To Do If The Thumbnail Doesn’t Change
If the thumbnail doesn’t change, this is usually caused by a lack of disk space.
Adding the thumbnail to the video file can take up a little bit of extra space on your computer’s hard drive or SSD. Therefore, if you’re completely out of space, the thumbnail may not be able to display.
Additionally, if Tag Editor makes a copy of the files, it will need an ample amount of space to create the second copy.
Of course, if you are still having issues, don’t forget to refresh File Explorer by clicking the refresh button, or pressing F5.
Conclusion
As you can see, changing the video thumbnails is simple.
Although it takes a little bit of time, this gives you far more control over what frame is used for the video thumbnail, which can make it far easy to see what the video is about without having to open it.
I hope that you’ve found this article helpful. If you have any other questions about Windows tweaks or you experience any issues, please let me know in the comments form below.
Wishing you the best,
– James McAllister
