Do you want to add photos to your Facebook account, but you don’t want them to get pushed out to other people’s news feeds?
Thankfully, doing so is actually quite easy!
Currently, you have two options. You can either make them completely private (so only you or specific people can view them), or you can leave them publicly on the photos section of your profile, but avoid pushing them to people’s news feeds.
In this article, I will show you how to do both of these options. Additionally, I will also show you how to privatize or ‘recall’ photos that you’ve already accidentally published. This works for any type of photo that you upload – even profile pictures!
Let’s get started!
How Do You Add Photos To Facebook Without Posting Them To Friends?
Thankfully, adding photos to Facebook without posting them to anyone’s feed is easy!
All you’ve got to do is change the privacy settings on the post when you go to post it. Then, change the privacy settings back a few days later, after it would normally be out of people’s feeds.
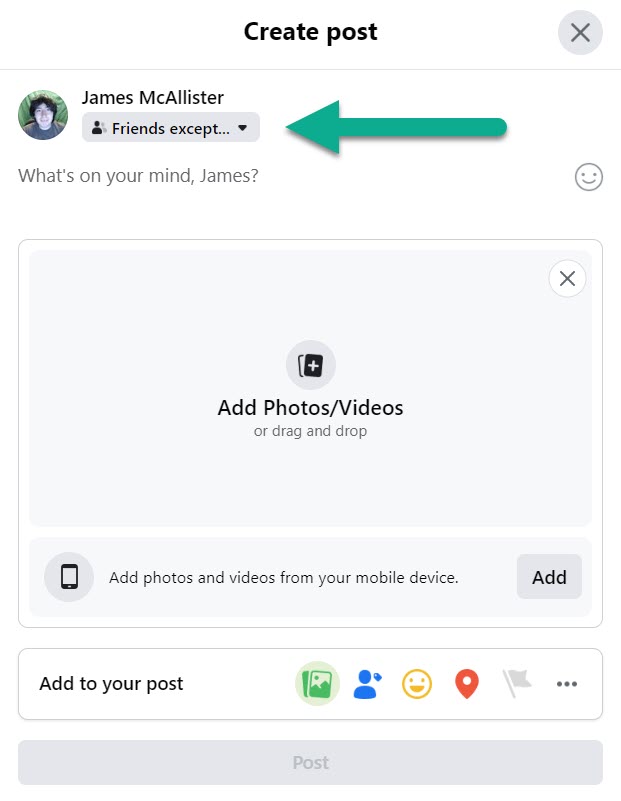
To change the privacy settings, simply click on the icon below your name when you go to post your photo.

Then, you can choose whether you want to share it publicly, with your friends, specific people only, or only you.
If you want to prevent the photo from being pushed to people’s feeds at all, select the ‘Only Me’ option.
At this point, only you will be able to view the photo – and it won’t be pushed to anyone’s news feed!
What If You Still Want People To Be Able To View Them Later?
We now know how to privatize photos, on both desktop and on mobile.
But what if you want people to be able to view them manually by visiting the photos section of your profile? This can still be done, without pushing it to people’s news feeds at all.
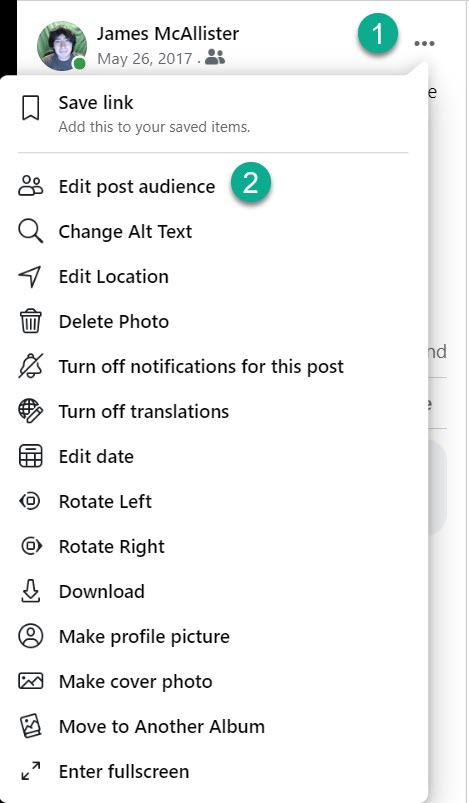
All you have to do is return to the photo (or the album), and click on the icon with three dots.
Then, click ‘Edit post audience’, and turn it back from ‘Only me’ to ‘Friends’ or any other option of your choosing.
On mobile, open the Facebook app and navigate to the photo. Then, tap on the icon with three dots in the top-right corner once the photo is opened, and tap on ‘Edit Post Privacy.’ The same options will be available to you, allowing you to customize exactly who can see the photo – be it friends, specific friends only, or even making it public!
For best results, I recommend waiting a couple of days before doing this after publishing. Because Facebook stops showing newly posted photos after a few days, this will prevent it from going back into people’s news feeds entirely!
Tip: Make A Private Album – Here’s How!
If you plan on making photos private often, you can save a lot of time by making a private album!
Then, when you want to upload new private photos, you can simply upload them to the album, rather than posting the traditional way. That way, you don’t have to change the privacy settings each time that you want to add photos – because the privacy settings are tied to the album, not the photos itself.
So, it’s particularly useful when you only want to share photos with specific people as well, such as family members or close friends only.
Thankfully, making a private album is easy.
How To Make A Private Album On Desktop
To make a private album on your computer, follow these steps:
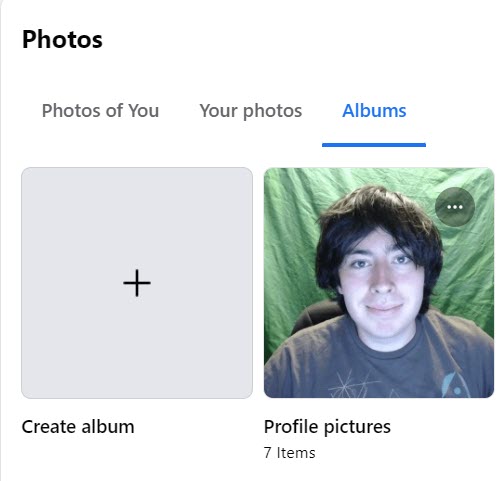
- Click on your profile.
- Click on the section with your photos.
- Click on ‘Create album.’
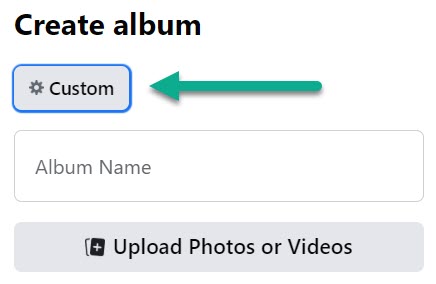
- Name your album.
- Click on the button with the gear icon to open your privacy settings.
- Select your preferred privacy settings for this album, then confirm them.
- Upload photos or videos to your album by clicking the ‘Upload Photos or Videos’ button.
Then you’re done! All photos within the album will have the privacy settings that you selected for the album. Simply return to it at any time to upload more photos or videos!
How To Make A Private Album On Mobile
To make a private Facebook photo album on the Facebook app, follow these steps:
- Tap on your profile.
- Underneath the ‘Your posts’ section, tap on ‘Photos.’
- On the navigation menu across the top, tap on ‘Albums.’
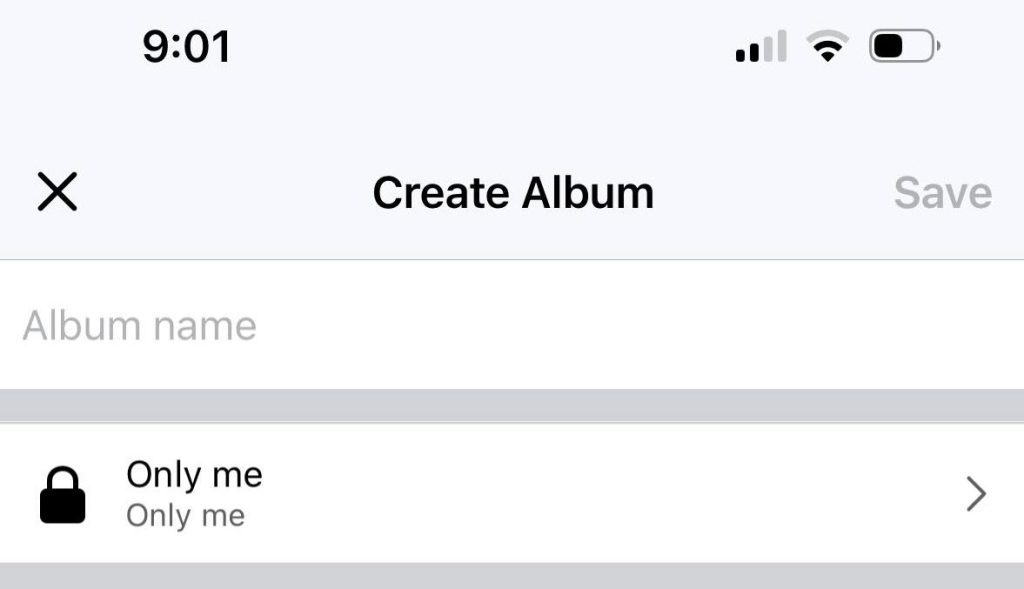
- Tap on ‘Create Album.’
- Name your album.
- Click on the privacy settings button, and change it to ‘Only me’ (or your preferred setting.)
- Tap ‘Save’ in the top-right corner.
How To Privatize Photos You’ve Already Published
Let’s say that you already ended up publishing a photo (or several) that are being pushed out to people’s news feeds right now. Is there any way to stop it?
Thankfully, there is!
If you go back to the photo’s privacy settings, you are still able to make changes to it. So, if you were to change it so only you could view the photo – or only specific people, it would immediately stop getting shown to people’s news feeds unless you granted permission for them to view it.
As a reminder, here’s how you can change the privacy settings on desktop:
- Go to Facebook’s website.
- Locate the photo you want to change the privacy settings on.
- Click on the icon with three dots next to your name and profile picture.
- Click on ‘Edit post audience.’
- Choose your new privacy settings, and confirm the changes.
Here’s how you can edit the privacy settings of a photo on mobile:
- Open the regular Facebook app, not Messenger or any other apps from Facebook.
- Navigate to the photo you want to make changes to.
- Tap on the icon with three dots in the top-right corner.
- Tap on ‘Edit Post Privacy.’
- Choose your new desired option, and confirm the change.
That’s all there is to it!
Conclusion
Thankfully, it’s easy to prevent photos from being pushed to people’s news feeds.
However, you will need to make it private at first, before making it public again if you want people to be able to view the photos later. If you plan on doing this frequently, you can save time by making a private album instead.
I hope that you’ve found this article helpful, and you’ve managed to share your photos while keeping them out of your friends’ news feeds. If you are still having trouble or you have any questions, ask them below and I’ll be happy to help.
Wishing you the best,
– James McAllister
