Are you playing back recordings from your Ring camera, and noticing that the audio is distorted?
You could be experiencing static noise, or it may take the form of crackling or buzzing. In any case, it’s not the clear audio quality you should be expecting!
Thankfully, the cause of this problem is well known, and so are the fixes. In this article, I’ll be covering how to solve it if your Ring camera is experiencing audio issues.
Note that these strategies work not only for Ring Doorbell cameras, but also other Ring cameras like the Spotlight, Floodlight, and Stick Up cams.
So, let’s get started!
1. Check Your Network Connection

The overwhelming majority of the time, audio issues are caused by a poor network connection.
This means that while your Ring camera may have a strong enough signal to record video, it doesn’t have a strong enough signal to due its job optimally.
When that happens, you won’t only experience static or crackling issues with the audio, but you may notice that the video becomes pixelated or blurry as well.
Note that it could also be an issue with the device you’re trying to view the video on.
For example, the Ring camera may have captured the audio perfectly – but if your phone doesn’t have a very good internet connection itself, the audio or video quality may suffer. Thankfully in these instances, the underlying footage is still perfect – and should play back correctly when your device has better signal.
2. Move Your Router Closer To The Camera

As already mentioned, static noise is often caused by a poor internet connection.
So, the best way to improve the connection your camera has (without upgrading your router or internet service package), is to simply move the router closer to the camera!
You can actually test to see how strong your signal is within the Ring app. To do so, simply follow these steps:
- Open the Ring app on your phone or tablet.
- In the top-left corner, tap on the icon with three horizontal lines. This is sometimes referred to as the ‘hamburger icon.’
- Tap on ‘Devices.’
- Tap on the Ring camera you wish to check the signal strength on.
- Type on ‘Device Health.’
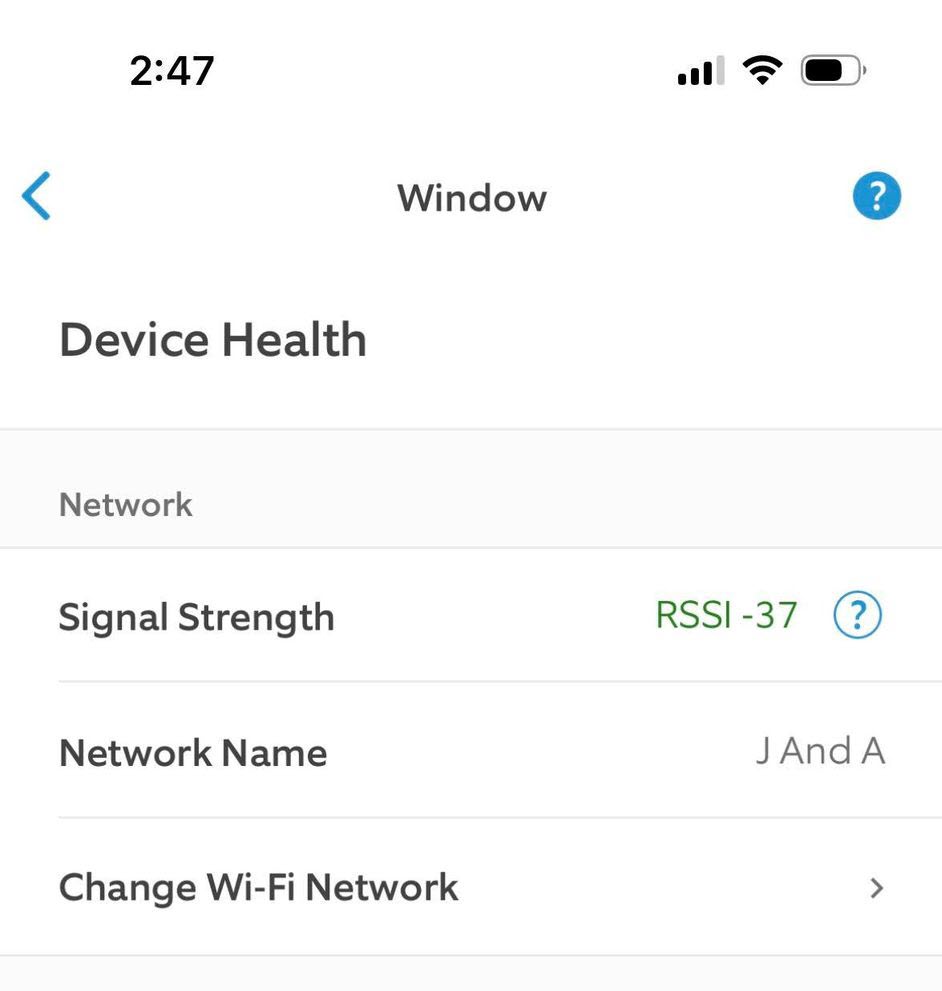
- Under the ‘Network’ section, view the value next to ‘Signal Strength.’
According to Ring, a value of -40 or higher is good, while -66 or lower is poor and may cause issues (such as static or crackly audio.)
In the example photo above, you can see that the value listed is -37, meaning the camera should record without any issues whatsoever!
If you check the app and you are already at -40 or above, moving your router may not be necessary. If the signal strength is worse however, you may benefit by moving your router closer to your Ring camera.
3. Unplug Your Camera, And Plug It Back In (If Applicable)
If it’s possible for you to do so, fully power off your Ring camera by either unplugging it for the wall, or remove the battery from the device.
This will allow it to fully power off and back on, which has been known to fix many random Ring camera issues.
Additionally, powering the device off and on again will make the camera check for any firmware updates. Ring issues firmware updates not only to introduce new features, but to fix known bugs as well.

You can also manually check for a firmware update within the Ring app, by following these steps:
- Open the Ring app on your phone or tablet.
- Tap on the icon with three horizontal lines in the top-left corner.
- Tap on ‘Devices’, and then tap on the device you want to check.
- Tap on ‘Device Health.’
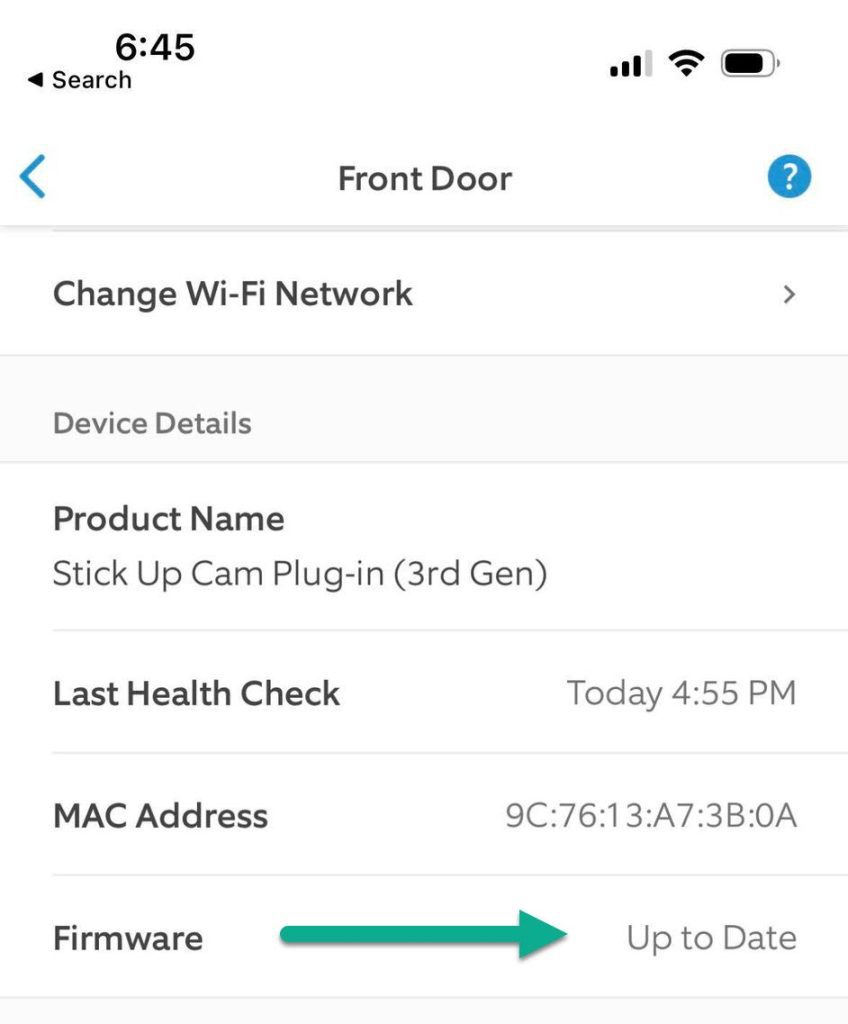
- Scroll down to the ‘Device Details’ section and find ‘Firmware.’
- If your device is on the current firmware, it will say ‘Up to date.’
Note that after restoring power to your camera – or updating the firmware, it may take a few moments before it starts recording again.
Take another test recording, and check the audio. If the static, distortion, buzzing or crackling issues are gone, congratulations!
Otherwise, continue onto the next step.
4. Download The Footage To Your Device

At this point, we want to check to see whether the issue is with your Ring camera itself, or simply the device that you’re playing the recordings on.
In order to know for sure, find a piece of footage with crackling audio, and download it to your device itself.
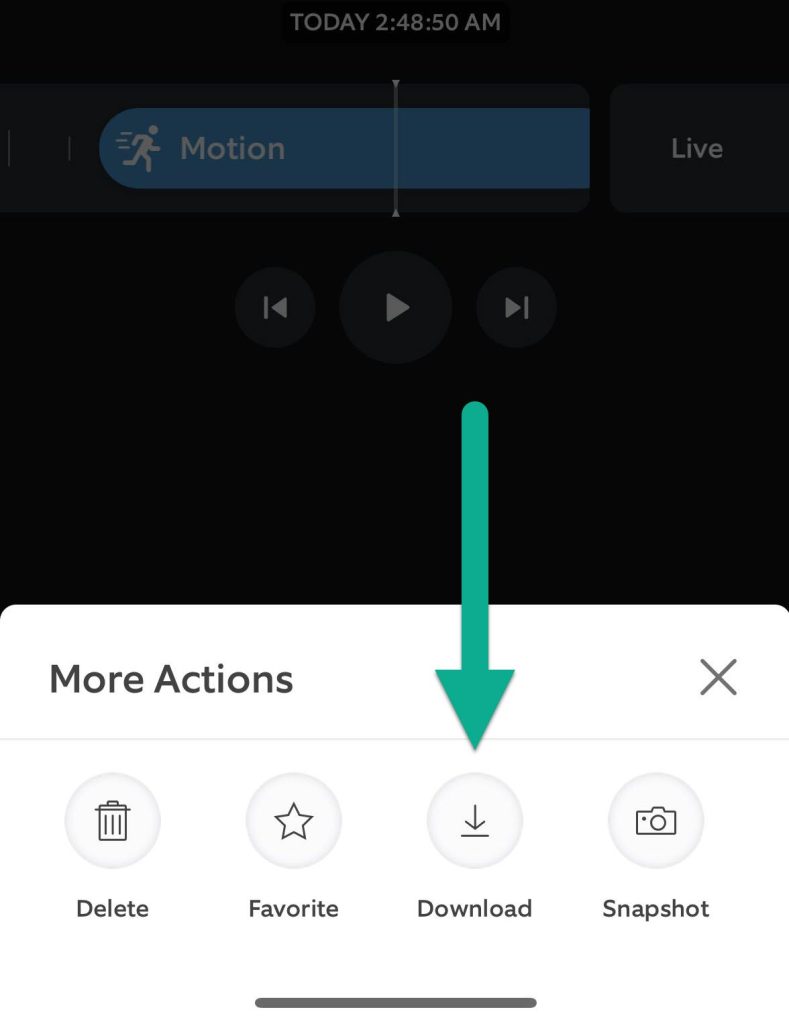
On the Ring app, this can be done by tapping on the ‘More’ icon running across the bottom of the screen. Then, tapping on ‘Download’ on the new menu that pops up.
This will fully download the clip to your device. If you’re on a phone or tablet, it should be viewable within your Photos app.
It’s possible that the downloaded footage has perfectly fine audio, even if the audio was distorted when viewing it in the app.
If this is the case, this thankfully means that your camera is perfectly fine! Instead, this almost certainly points to either a poor internet connection on your device, or that Ring’s servers are currently experiencing trouble.
However, you shouldn’t need to continue on to other fixes at this point, because you know that the problem isn’t with your camera or its hardware.
5. Fully Reset The Camera
If you downloaded the footage in the last step and the audio issues are still persisting, it points to a problem with your camera itself.
While this is unfortunate, not all hope is lost!
The next thing to try is fully resetting your Ring camera. This is sometimes referred to as a ‘hard reset’, and is different from simply powering it off.
The reset button will vary depending on the exact camera model that you have. Here is a video showing you how to reset it on the Ring Doorbell. However, the reset button location for other Ring camera models will be posted below.
How To Reset Other Ring Cameras
- On Ring Doorbells, the reset button will either be on the right side of the doorbell, or on the back of it (potentially requiring you to remove it from where it’s currently positioned.)
- On the Stick Up or Spotlight cams, it may be on the top, or under the battery cover.
- On the Ring Stick Up Cam Elite, it will be under the cover at the back.
- On the Ring indoor cam, wired Spotlight cam, and the Ring floodlight cams, it will be on top of the camera.
Hold down the reset button for approximately 20 seconds, and then release it. Once your camera has been fully reset, go through the setup and reconnect it to your Wi-Fi network.
Then, take another test recording to see if the issue has been fixed!
6. Contact Ring Support
Finally, if you’ve tried every fix listed above – including fully resetting your Ring camera, the last thing to do is to contact Ring support.
You can reach Ring support by clicking here.
Unfortunately, this points to a serious hardware issue that you’ll be unable to fix on your own. However, Ring customer support will be able to do their best to help you sort things out, including potentially replacing your Ring camera if it is still under warranty.
All Ring cameras come with a warranty of 1 year by default, and an extended warranty with their Ring Protect Plus and Ring Protect Pro plans.
So, if your camera is eligible, it may just be best to get a complete replacement – hopefully eliminating the audio problems for good!
Conclusion
Ring cameras are known to be of exceptional quality, and shouldn’t experience audio issues like crackling or static.
That being said, audio issues are usually caused by a poor internet connection, rather than anything wrong with the camera itself. In addition to improving your connection, performing a full reset of the camera is often enough to fix the problem.
I hope that you’ve tried out the fixes mentioned above, and have already found one that’s worked for you.
If you have any other questions about Ring cameras, ask them below and I’ll be happy to help.
Wishing you the best,
– James McAllister
